
 29
29
Objective:
Increase the effectiveness of outbound emails to Customers by including a photograph of the Route Service Representative along with their name in the communication. The photograph adds a level of personalization to the message, helps to build name and face recognition, and helps to accelerate the building of long-term relationships that are critical to account retention.
Several emails to Customers have been customized to read as if they are coming directly from the Route Service Representative, Service Manager, and/or Regional Service Director (e.g. Delivery confirmations, Introductory emails, and non-deliverable notifications.
This training is to show step-by-step instructions on how to load the Route Service Representative’s photograph to the Nixon Solutions Application database.
Nixon Medical Solutions Application:
Nixon Service Leadership must have the Nixon Medical Solutions Application loaded onto their laptop to perform Route Assignment Maintenance. Their profile must also meet requirements to perform route assignment maintenance. The application icon looks like the following:

The Route Assignment Maintenance function is the process that allows RSR-specific data, along with the RSR’s photo to be stored in the database.
Step 1:
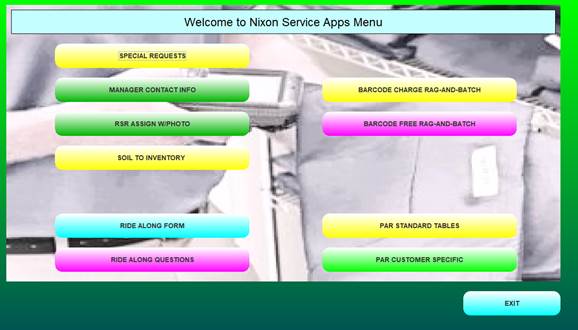
The “Welcome to Nixon Apps Solution” screen is displayed to the User when the Nixon Apps icon is selected. Many functions may be selected from this screen. For this training, we will focus exclusively on the service menu and RSR route assignment maintenance.
Select “Service Menu”.

Step2: The service menu provides the User access to several service functions. For our training, we will focus on the RSR Assign with Photo function.
Select
Step 3:
The RSR Route Assignment Maintenance page is displayed along with the login dialogue box. Enter your username (last name, first initial (no space)). No password is required.
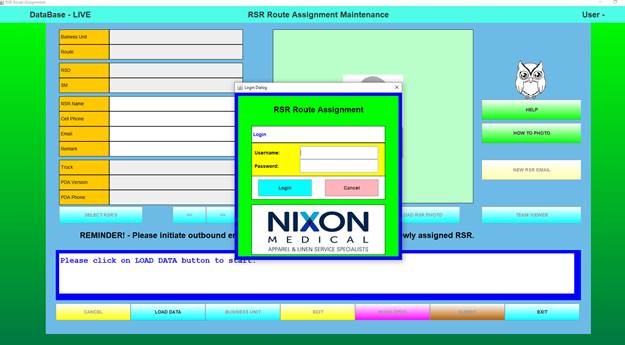
Select the blue login button.
(The application tracks who makes changes to the data and the date of the changes.)
Step 4:
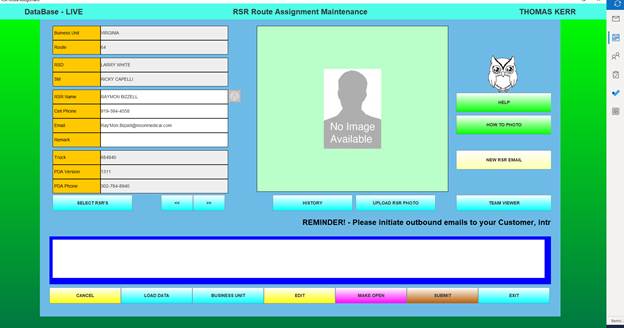
The RSR Route Assignment Maintenance page is displayed. . Select Load Data.

Step 5: Select Business Unit.
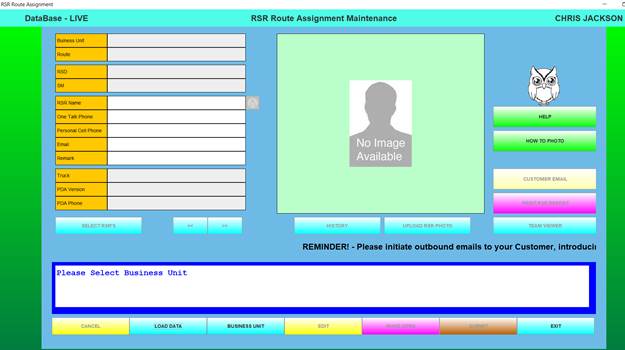
Business units populate. Select the appropriate business unit from the drop-down. For our example, select Virginia.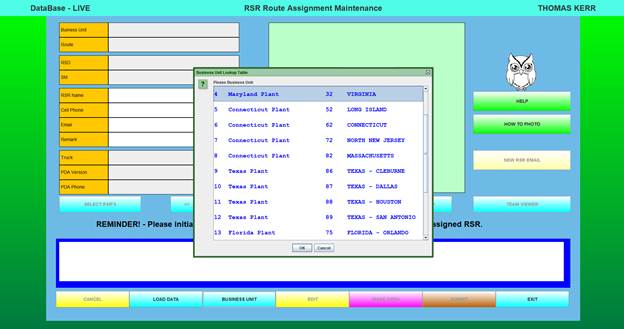
Step 6:
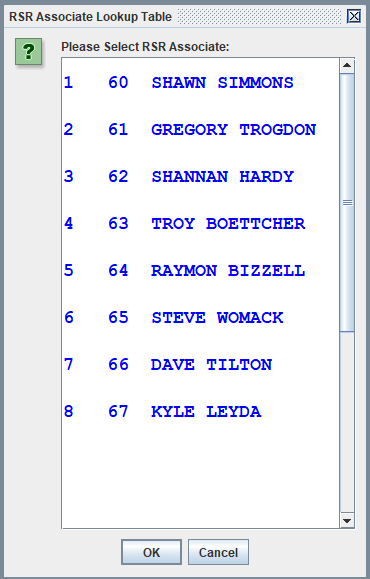
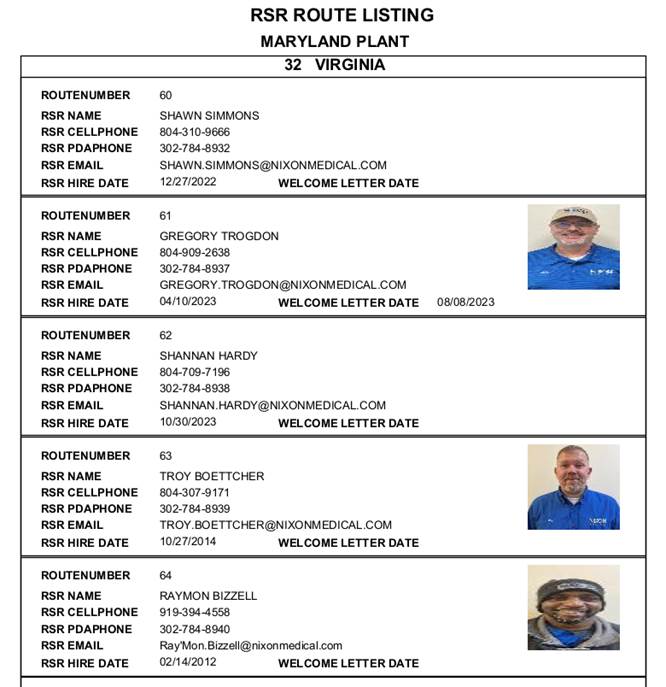
The “Select RSR’s” button provides a drop-down list of RSRs within the division from whom you may select or the arrow keys may be used to scroll through the list of RSRs. Team Viewer will also display the list of RSRs.

Drop down list of RSRs when Select RSR button is activated:
Step 7a:
Select “Upload RSR Photo.” (Assumes you have previously saved a photograph of the RSR to the public drive. See the “How to Photo” button for instructions. Refer to Appendix pages.)
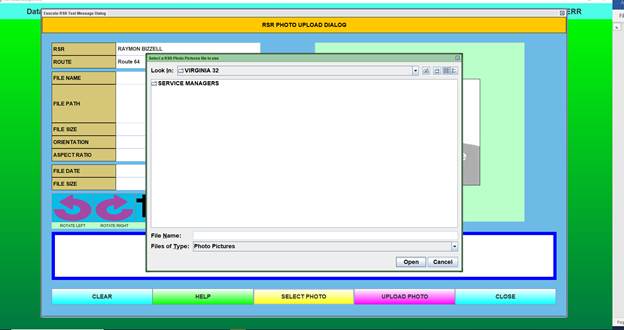
Step 7b: The RSR Photo Upload Dialog box appears. Select the “Select Photo” button.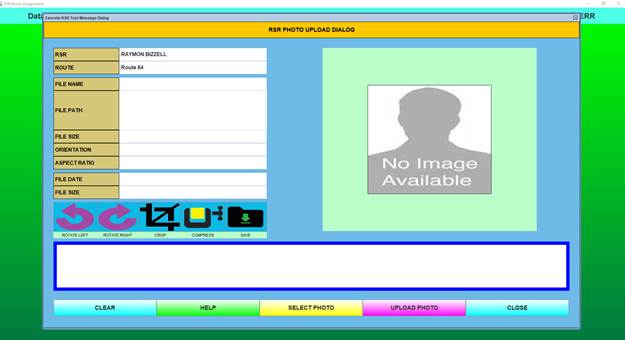
Step 8:
The application directs you to your PC’s file directory. RSR photographs are stored on the Nixon Medical Public drive. Use the arrow to locate the public drive.
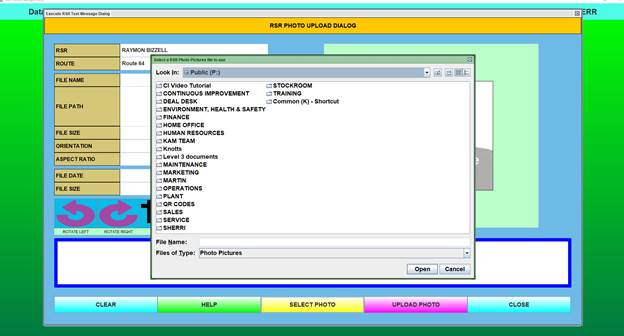
Step 9: Select “Service”
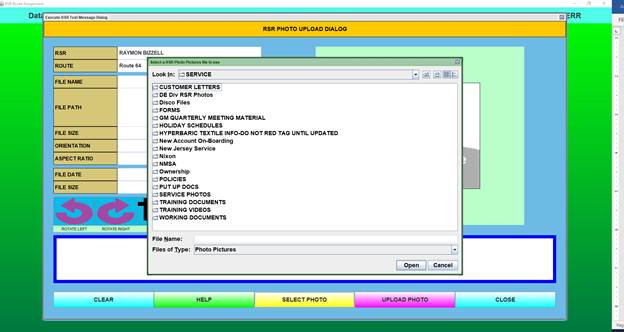
Step 10: Select Service Photos
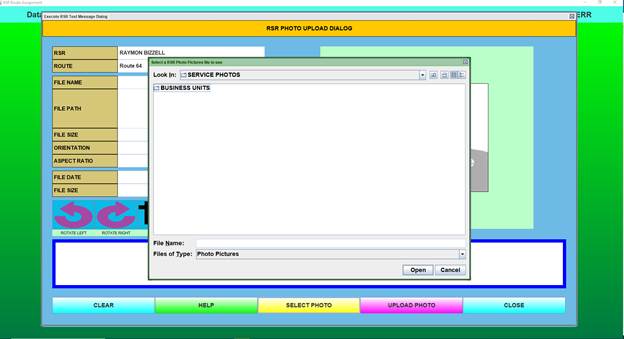
Step 11: Select the business unit.
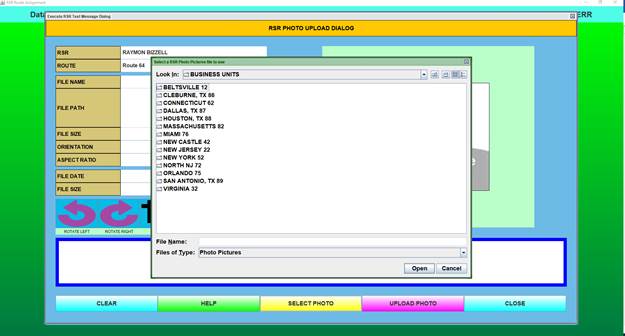
Step 12: For our example, Ray’Mon’s photo is located in the Virginia business unit folder. Select Virginia
Step 13: Select Service Managers
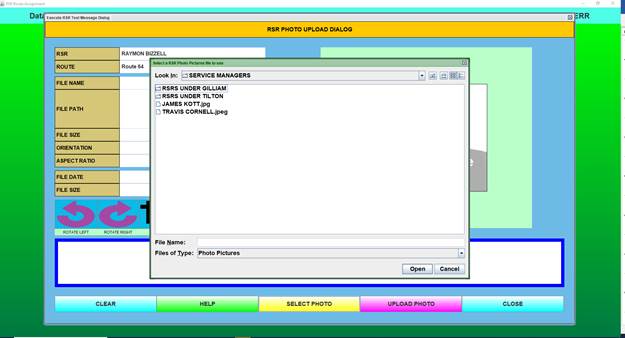
Step 14: For our example, we will select “RSRs Under Tilton”
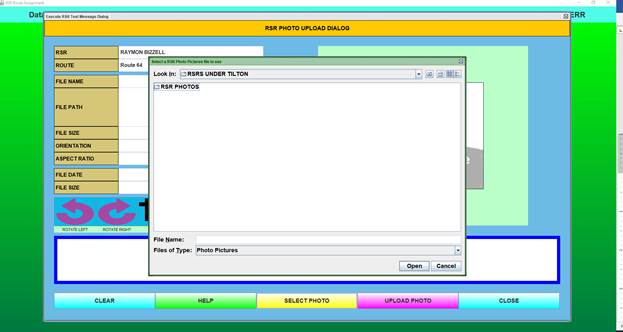
Step 15: Select RSR photos.
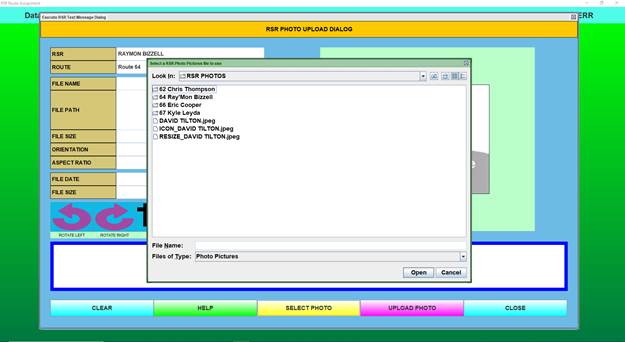
Step 16: Select Ray’Mon, Bizzell
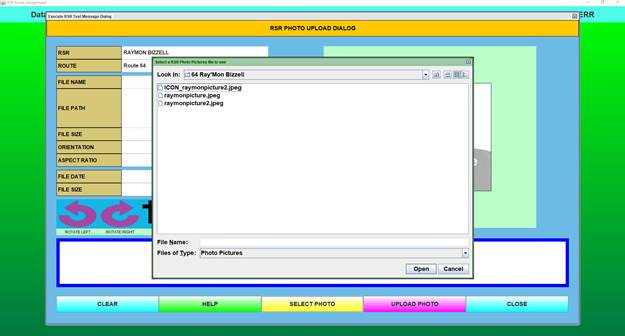
There are several Ray’Mon Bizzell photos we may select from. Select the photo you wish to load.
Step 17: The RSRs image will appear within the application.
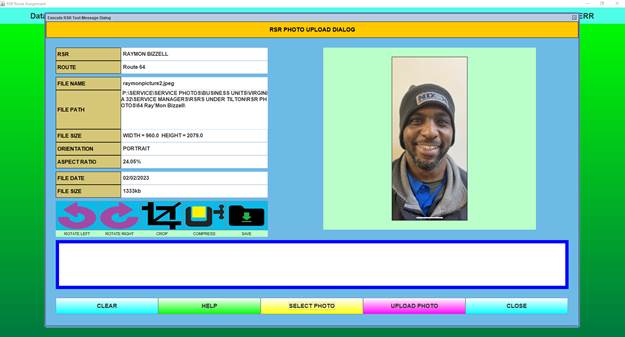
Photo tools allow you to rotate, crop, compress and save the image.
Step 18: Select “Save”
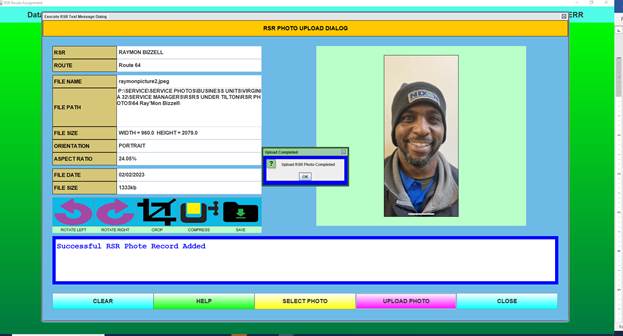 The Upload RSR photo completed dialogue box will appear. Confirm “OK”. Your photo is successfully saved to the database.
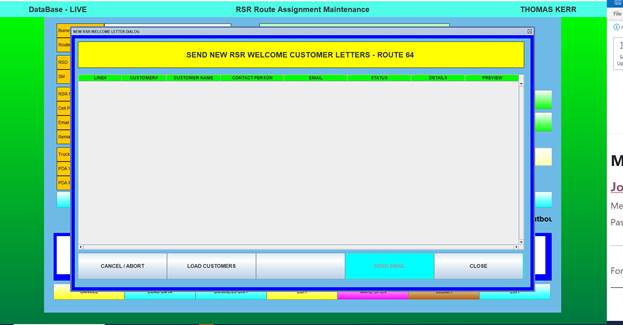
Step 19: If your RSR is newly assigned to the route, make sure all necessary information is added including the Verizon One Talk phone number, select the “new RSR email” button. The “New RSR Email” button allows you to send a ”mass” outbound email to introducing your new RSR. 
Step 20: The new RSR Welcome Customer Letters screen will appear. Select “Load Customers”.
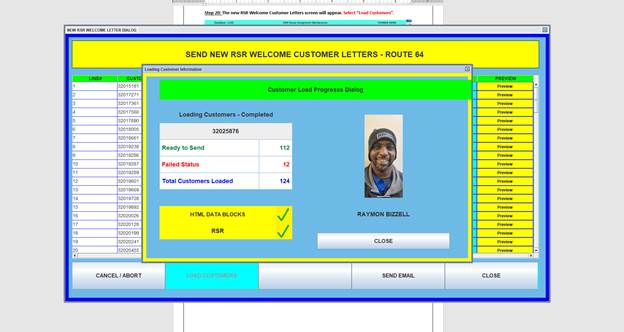
Step 21: The Customer Loading Progress screen will appear. The system will identify the number of customers with a valid email address on file and those without a valid email. When the file reads “completed”, select the “close” button.
Step 22: The “New RSR Welcome Customer Letters” screen will highlight customers with missing email address in red. 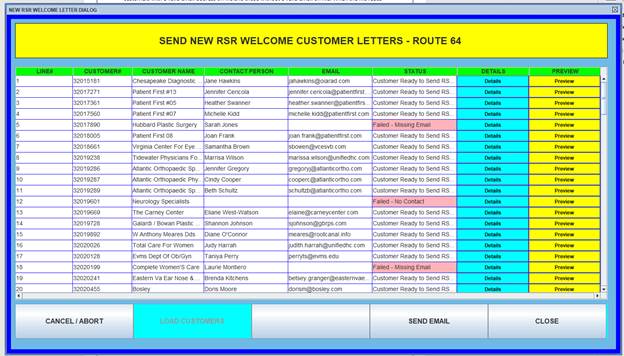
Step 23: Select the blue “Details” button to see the error type.

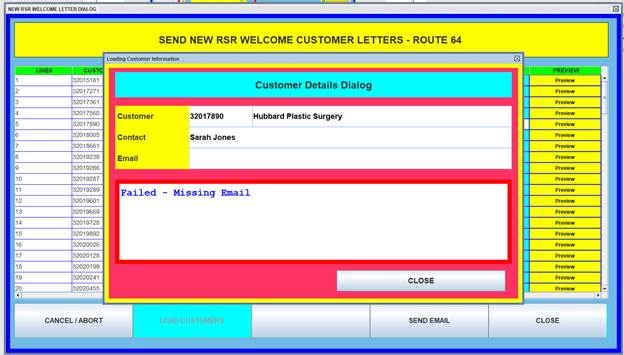
The custom details dialogue box displays the error type. Select “Close.”
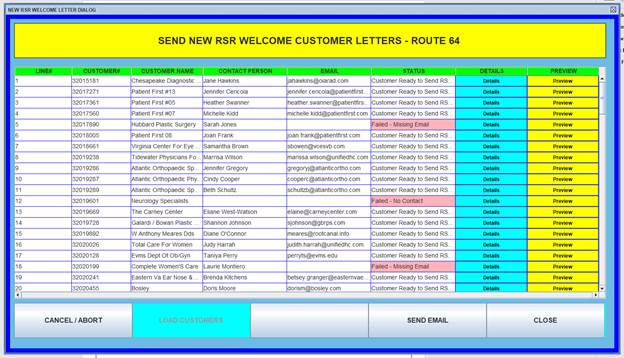
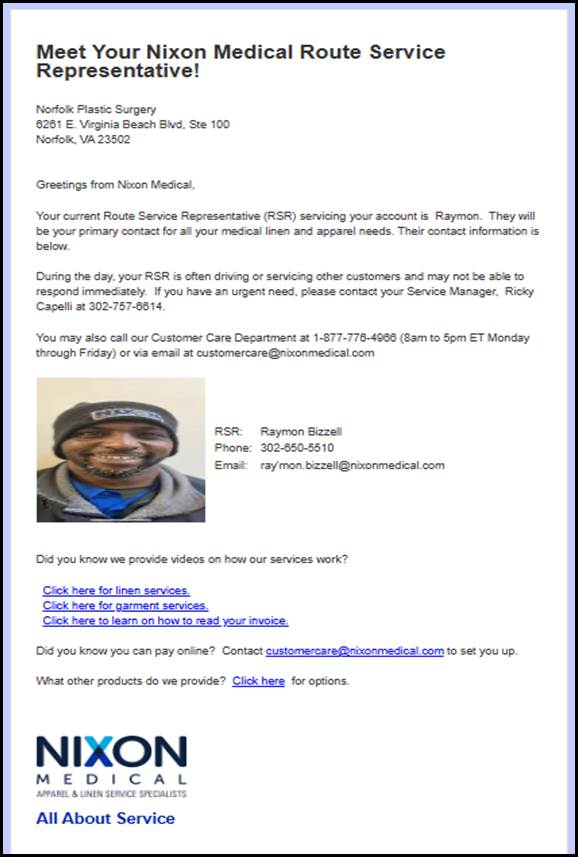
Step 24: Selecting the yellow “Preview” button displays a sample of the email that will be sent to the customer.

Step 25: A preview of the customer email will appear. Select “Send”- emails will be sent to all customers that did not have an error message next to them.
Step 27: Select Close.

You successfully emailed the new RSR Welcome Customer Letter to all of Ray’Mon’s customers.
Step 28: The Service-ABS RSR List Photo report is a log of all RSR photos and contact information currently within the ABS database. It provides a recorded date when the RSR welcome letter was emailed to Customers.
Ray’Mon’s welcome letter date is not populated in our example. We used Ray’Mon for “test” purposes.

