18
18
Objective: A responsibility of the RSR is to constantly evaluate the Customer’s inventory to ensure patient demand is met. The ABS Garment Add Product process outlines the steps necessary to add product to the Customer’s invoice and to ensure the product supply and delivery chain are systematically established. Adding products is a method for the RSR to grow route sales and to build a positive customer experience.
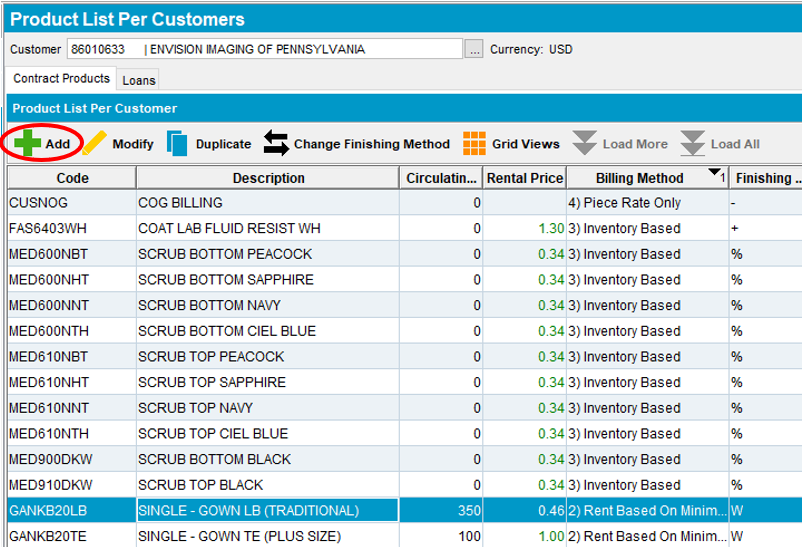
Location: ABS: Customer Maintenance: Product List Per Customer
Who is Responsible: The responsibility for adding and adjusting the quantity of garments to an account lies with the Route Service Representatives (RSRs) and designated Service team. There are different methods to add linens and garments to an account. This process is focused on adding garments which include lab coats and scrubs. Garments must be added to an account using a PC. Garments cannot be added using the PDA.
To add product to a customer account via the PC, complete the following steps:
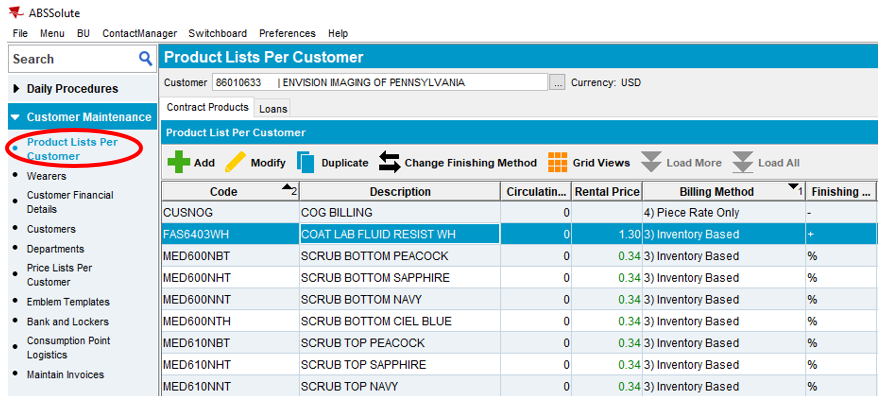
- Go to ABS: Customer Maintenance – Product Lists Per Customer
2a. Enter the Customer Number
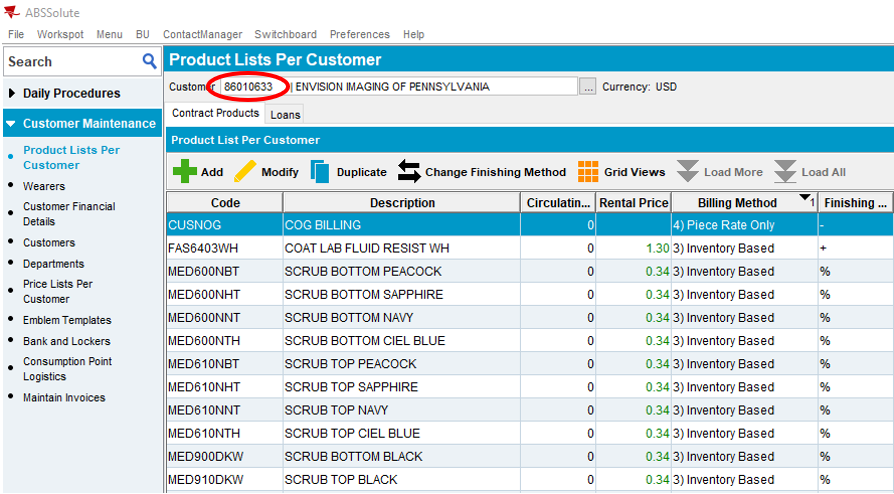
OR
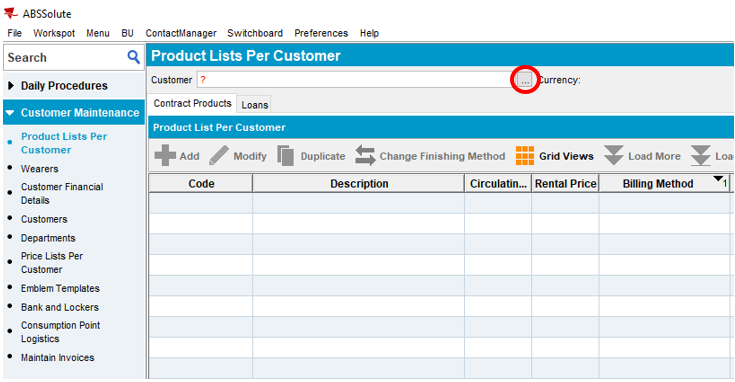
2b. Use ellipses to locate the desired customer from the drop down
- Select the Add button
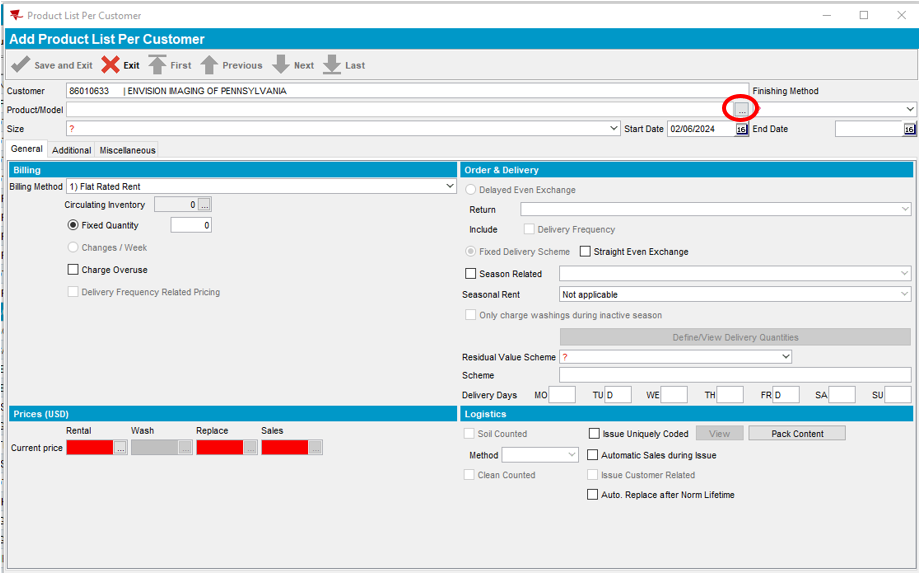
- Select the ellipses to locate the desired product
- Select the product description or enter the sku code in the Contains field
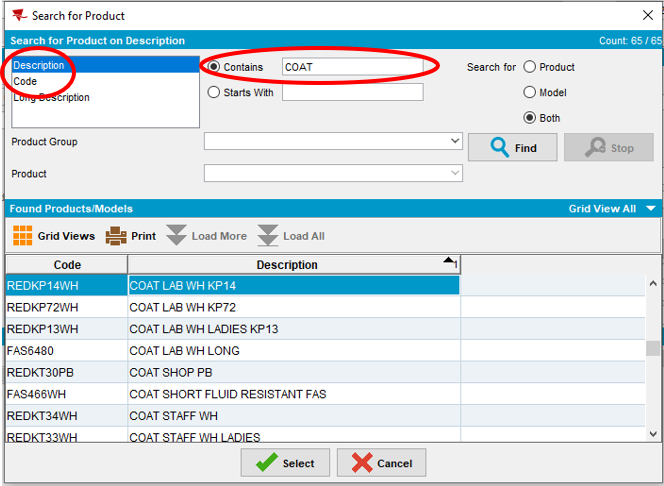
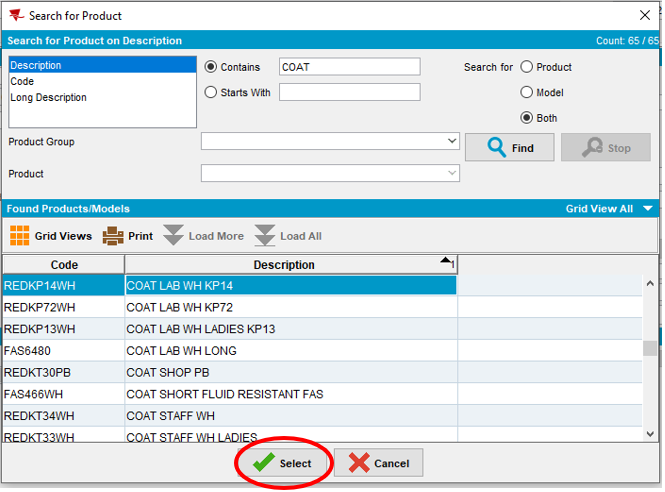
- Highlight the product you would like to add. Click “Select”
Note: In our example, we are selecting COAT LAB WH KP14
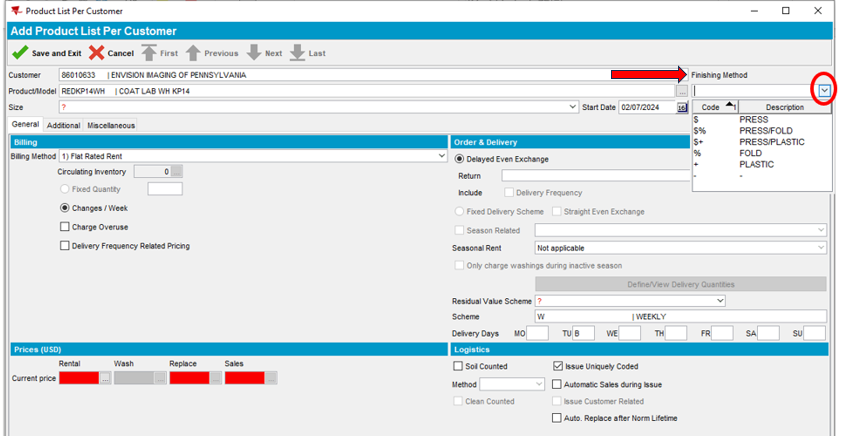
- The Product/Model will populate. Select the dropdown under Finishing Method and select the garment finish
Note: Dash (-) means tunnel dry only and will not get pressed
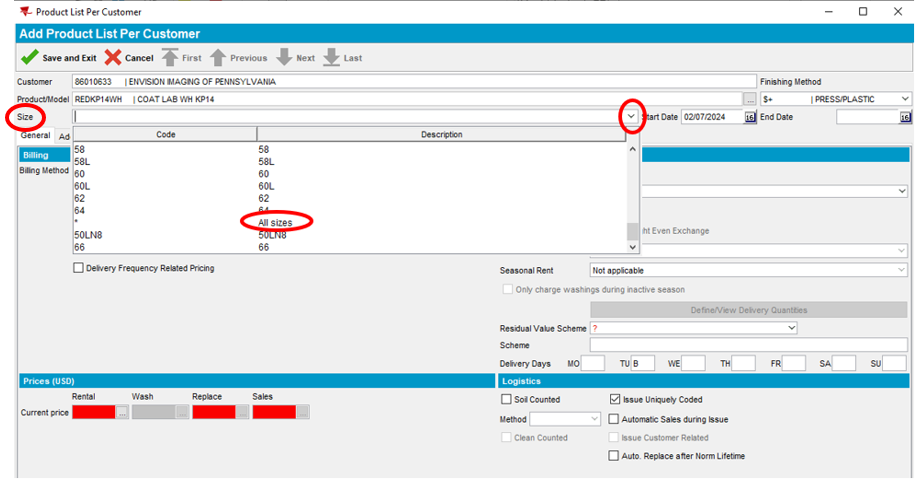
- Select the dropdown on the Size line. Select ”All Sizes”
Note: If you select a specific size and not “All Sizes”, you are limited to adding garments in that specific size only. It is important to select “All Sizes” – this enables you to add from the range of all available sizes in the future.
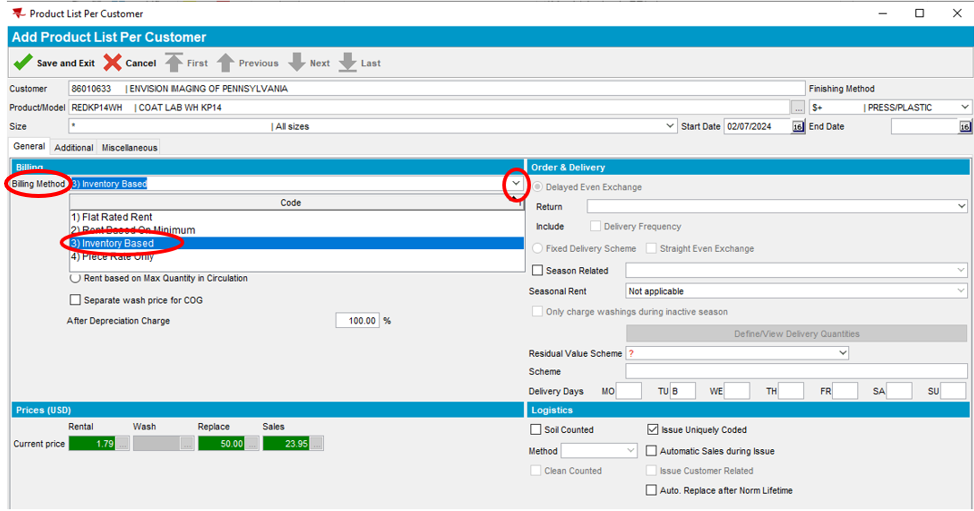
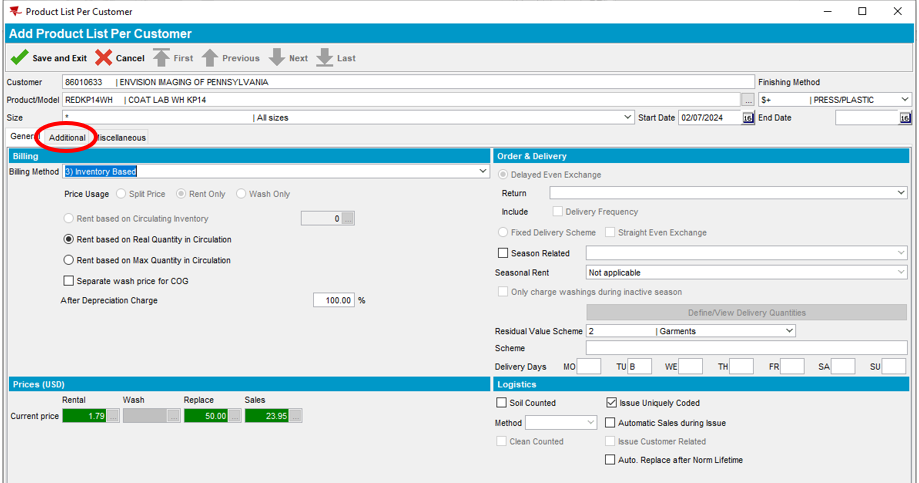
- Select the dropdown next to Billing Method and select “Inventory Based”
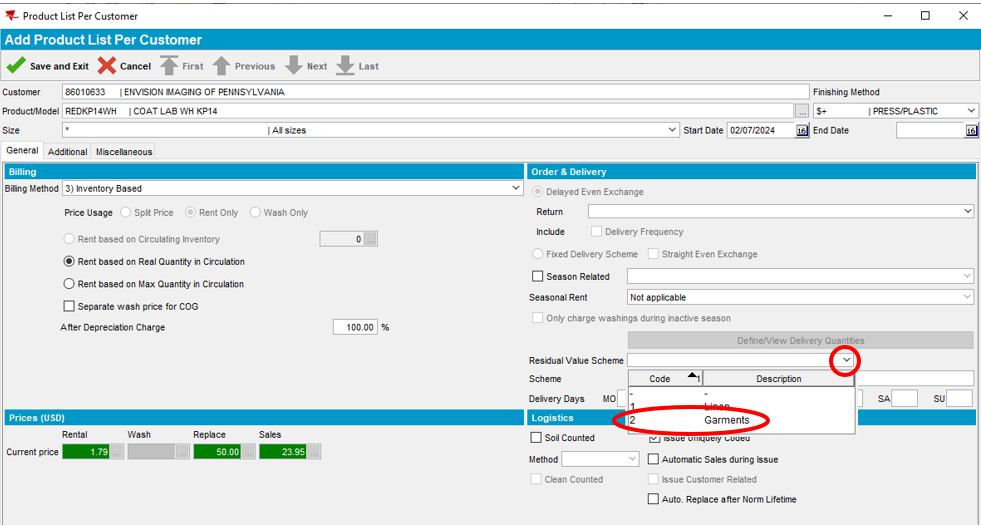
- Select the dropdown next to Residual Value Scheme and select Garments. This ensures that the garment item selected aligns with our product category.
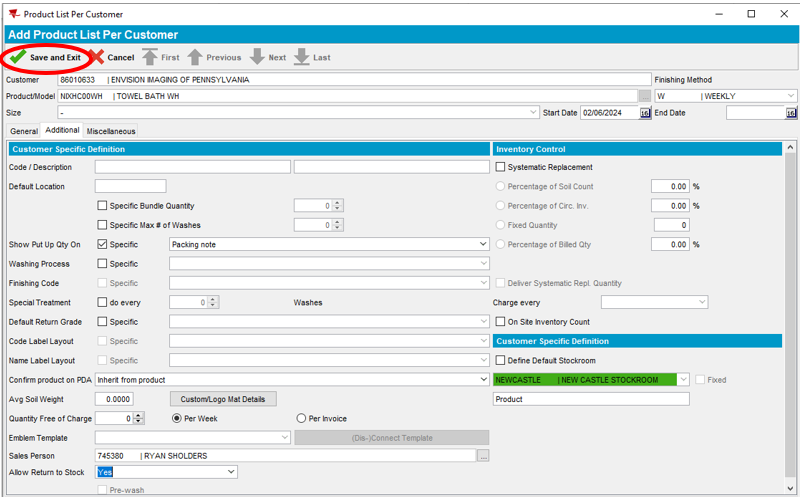
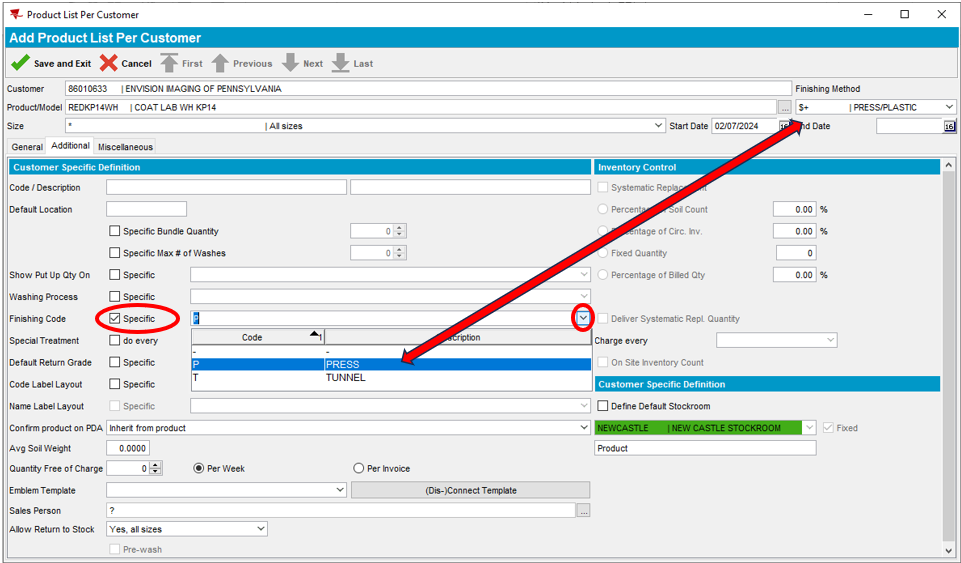
- Select the Additional tab
- Check the box next to Finishing Code. Select the dropdown on the same line. Select the finishing method
Note: Make sure the Finishing Code description matches the Finishing Method description. The descriptions must match for the garments to be processed correctly through the plant.
- Select the ellipses located in the Sales Person field
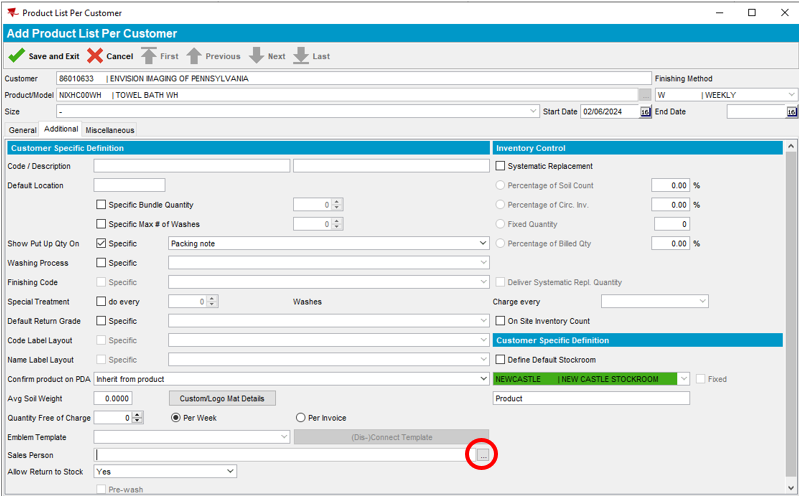
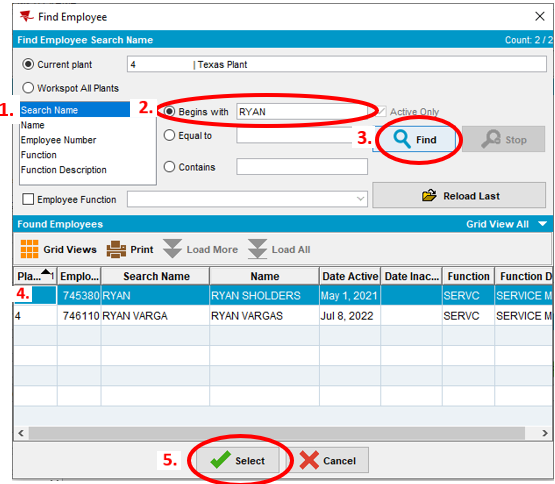
- Select Search Name. Enter the first name of the RSR assigned to the route, Select Find
Note: This field must be filled in or ABS will not allow you to save the new garment item to the account.
- Highlight the RSR’s name assigned to the route. Click “Select”
- Save and Exit