27
27
Objective: A responsibility of the RSR is to constantly evaluate the Customer’s inventory to ensure patient demand is met. The ABS Flat (Linen) Add Product process outlines the steps necessary to add product to the Customer’s invoice and to ensure the product supply and delivery chain are systematically established. Adding product is a method for the RSR to grow route sales and to build a positive customer experience.
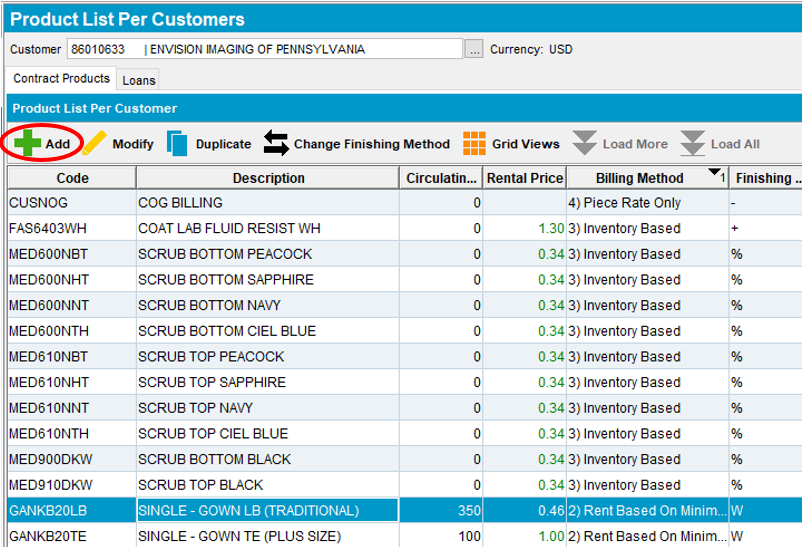
Location: ABS: Customer Maintenance: Product List Per Customer
Who is Responsible: The responsibility for adding items to an account lies with the Route Service Representatives (RSRs) and designated Service team. There are different methods to add linens and garments. This process is focused on adding linens or “flats” as they are often referred to in the industry. Flats include sheets, gowns, pillowcases, and non-wearer specific items. RSRs have the primary responsibility to make linen adjustments. They conduct their “adds” in the PDA. Service Managers and Regional Service Directors can also add new flat items to an account in ABS. Service Managers and Regional Service Directors conduct their transactions on the PC.
To add product to a customer account via the PC, complete the following steps:
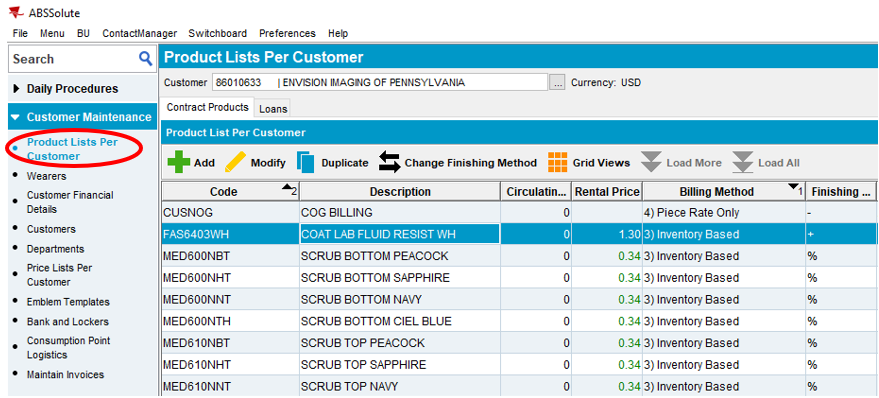
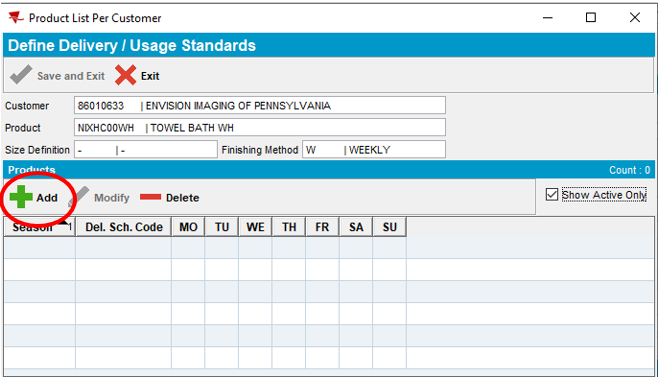
- Go to ABS: Customer Maintenance – Product Lists Per Customer
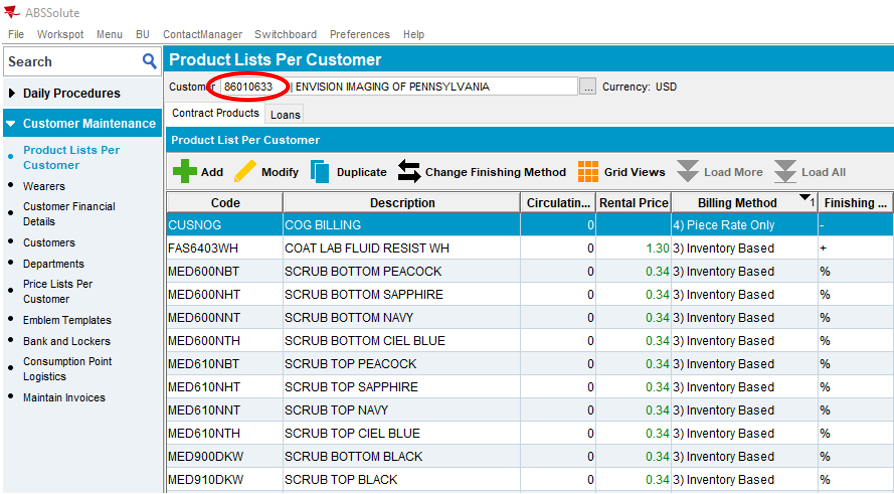
2a. Enter the Customer Number
OR
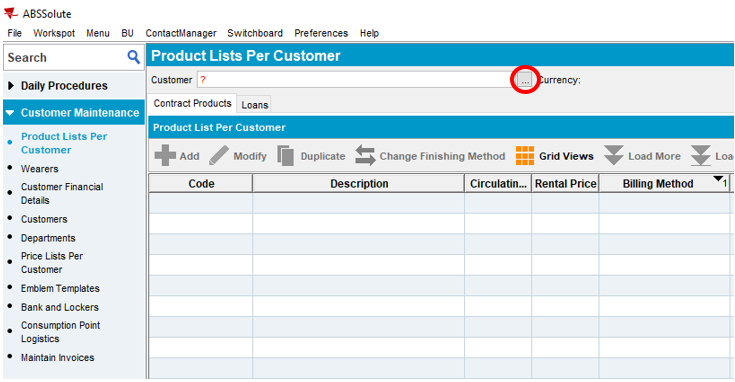
2b. Use ellipses to locate the desired customer from the drop down
- Select the Add button
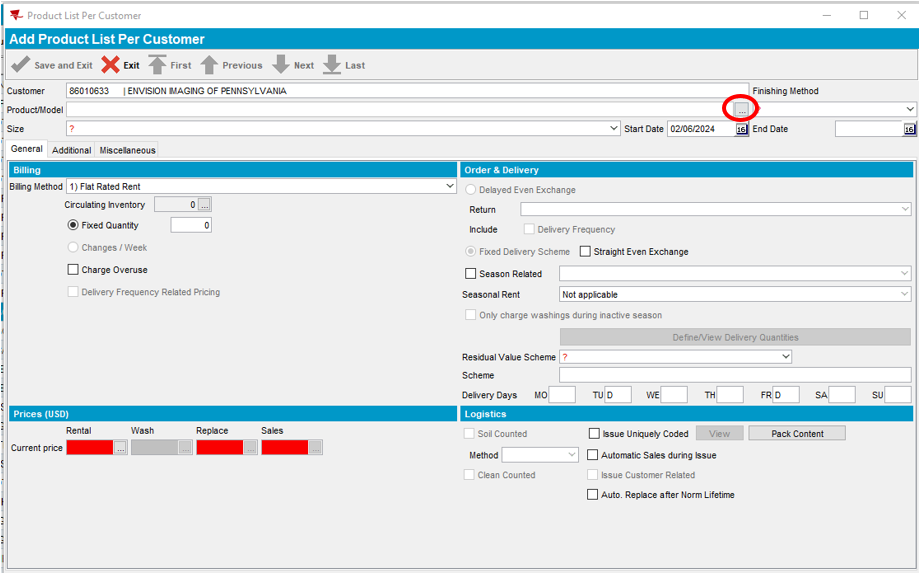
- Select the ellipses to locate the desired product
- Select the product description or enter the numeric code in the “Contains” field
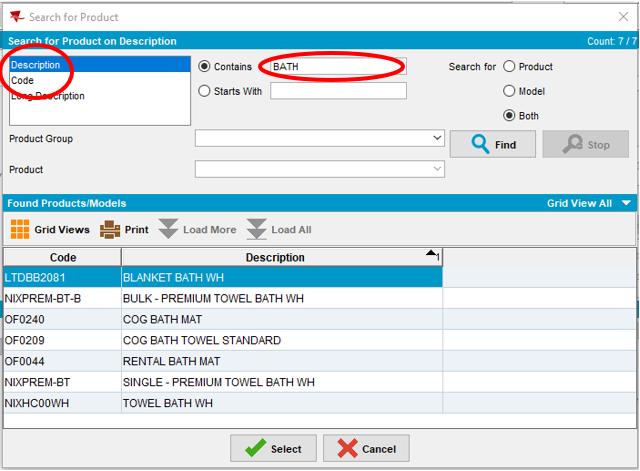
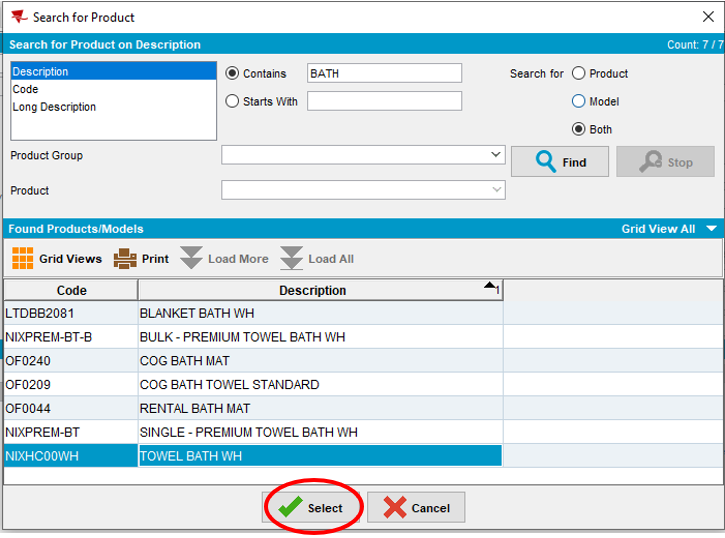
- Highlight the product you would like to add, then hit Select
Note: In our example, we are selecting Bath Towels
- The Product/Model will populate. Select the dropdown under Finishing Method and select the service frequency “Weekly”

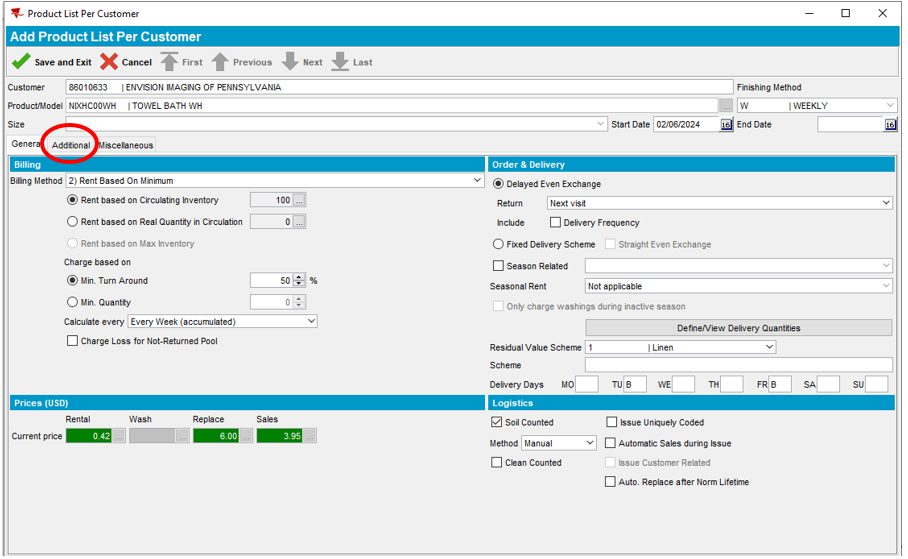
- Select the dropdown next to Billing Method and select Rent Based On Minimum
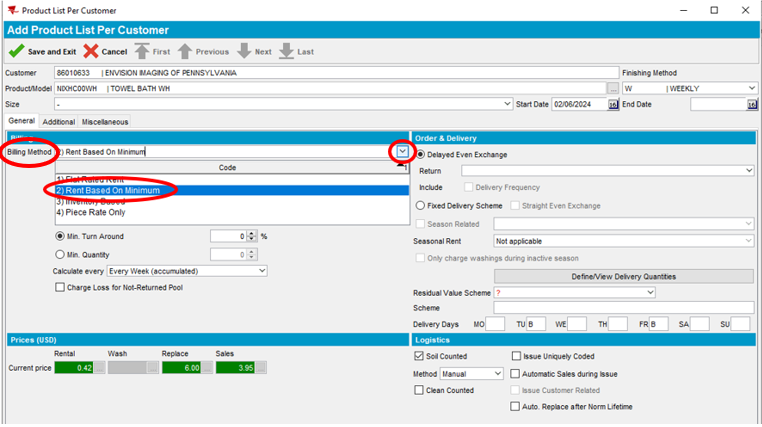
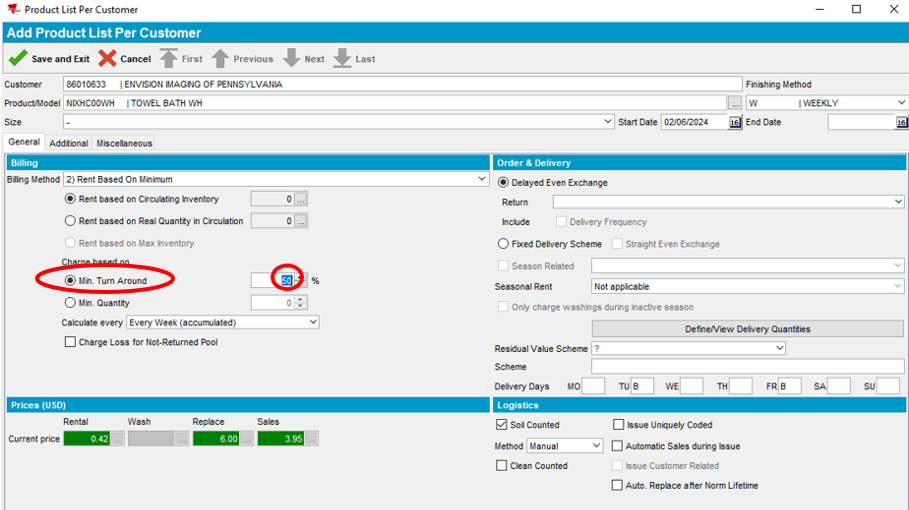
- Type “50” in the Min. Turn Around field
Note: Flats (linen) are billed (invoiced) 50% of circulating inventory. This means that 50% of the product is at the customer location while the other 50% of the product quantity is elsewhere in the laundering process.
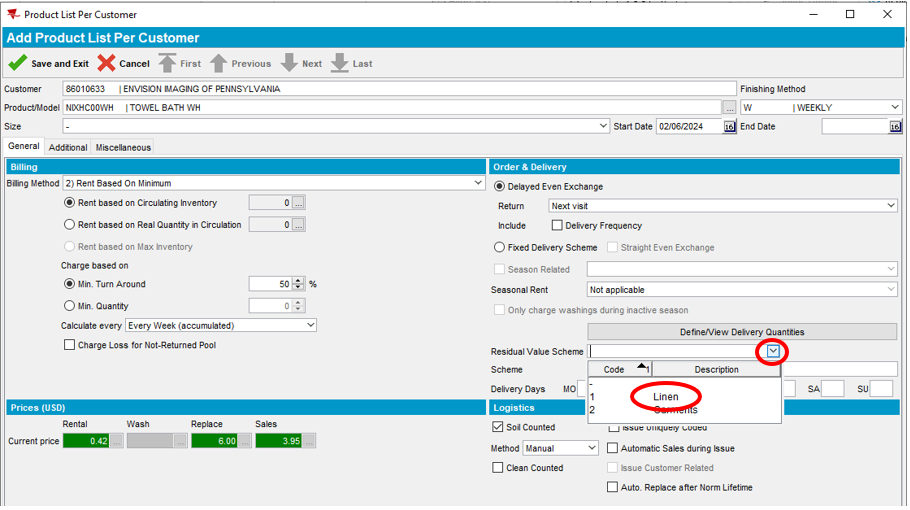
- Select the dropdown next to Delayed Even Exchange and select Next visit. This ensures that the product will be on invoice on a weekly basis per the Finishing Method.

- Select the dropdown next to Residual Value Scheme and select Linen. This ensures that the flat item selected aligns with our product category.
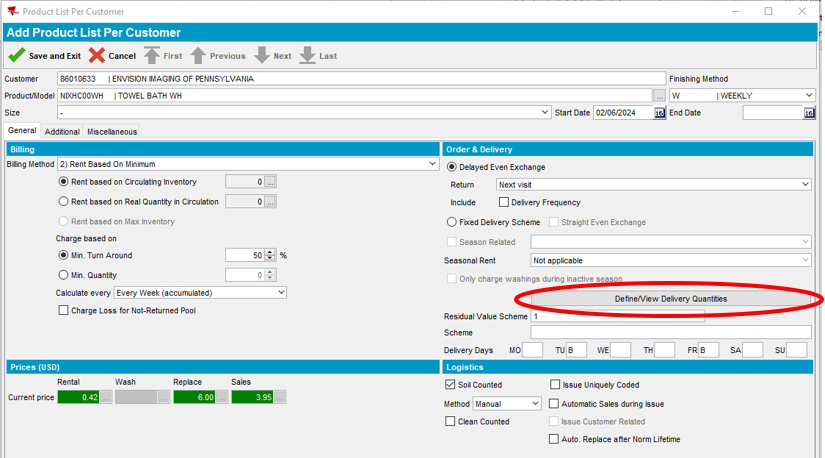
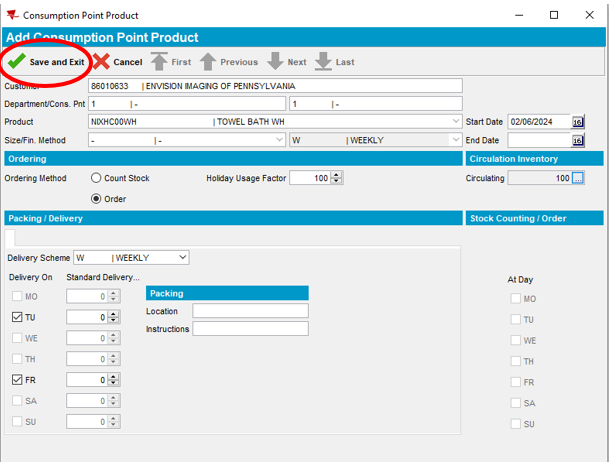
- Select Define/View Delivery Quantities
- Select Add
- Select the Calendar icon next to the Start Date field and select the date you want to start billing for the flat item.
Note: Select today’s date if you would like the flat item to start billing on the next invoice. If you would like to bill the flat item at a future date, select a day prior to that weeks’ delivery day.
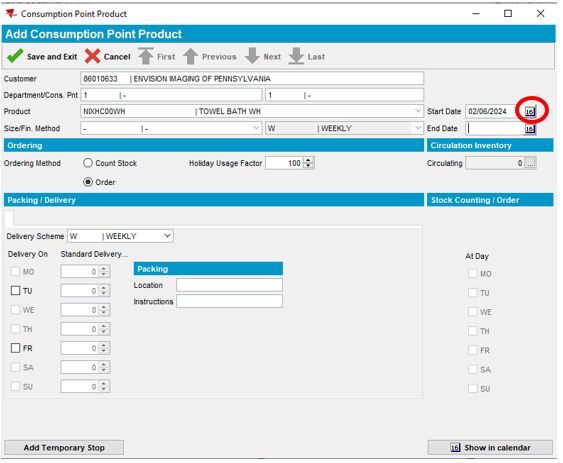
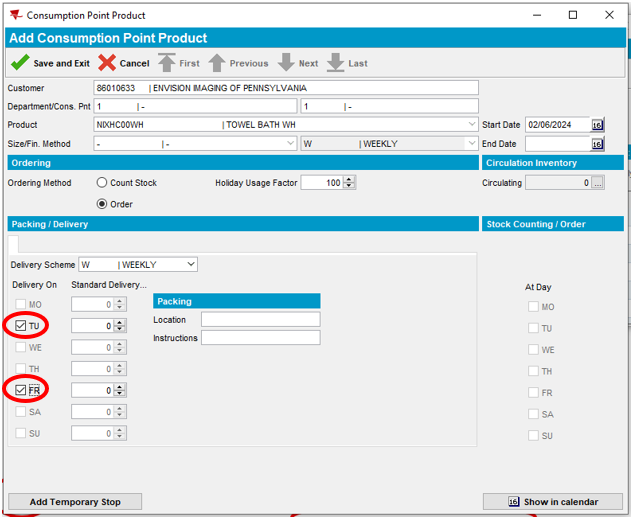
- Select the product service days. Existing customer service/delivery days are in bold. Non-delivery days are greyed out and are not an option for selection. To ensure flats items are listed on the RSR Put Ups (load outs) and flats are delivered on the assigned service days, all service days must be selected.
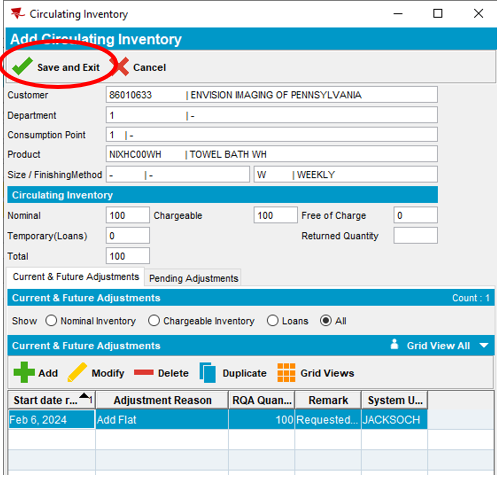
- Select the ellipses located next to Circulation Inventory
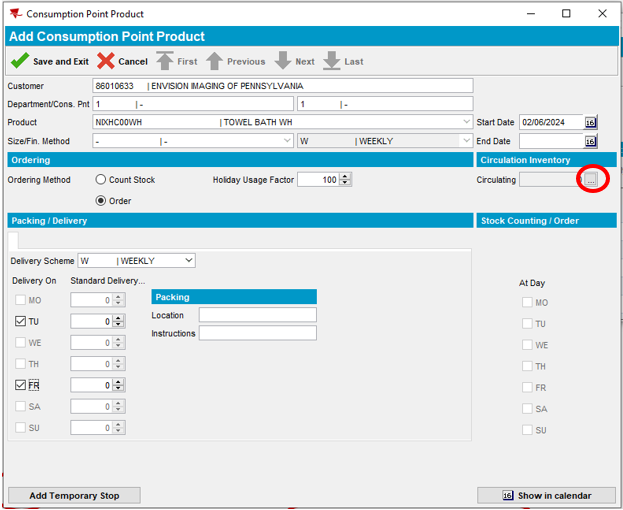
- Select Add
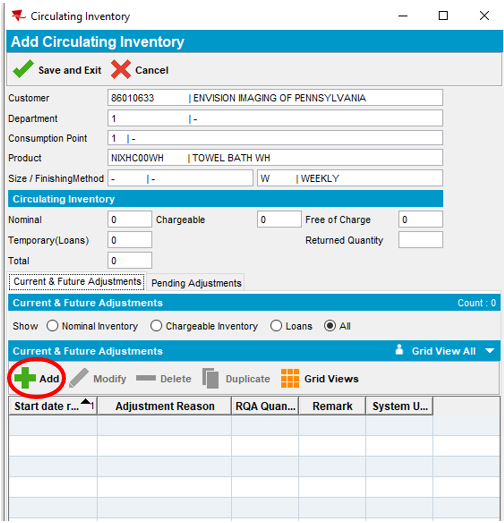
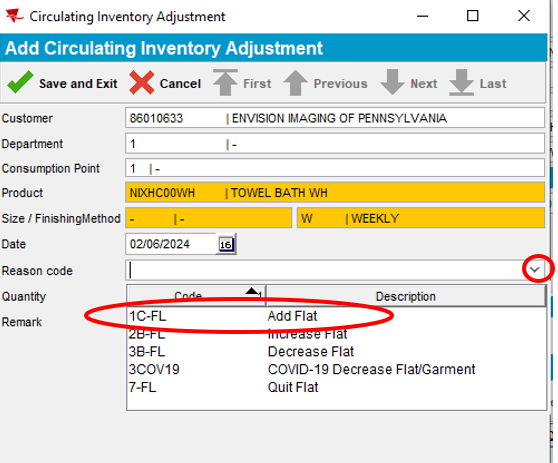
- Select the dropdown next to Reason Code and select Add Flat
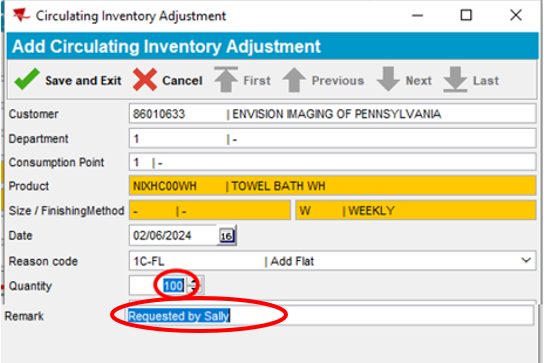
- Enter the Quantity (Circulating Inventory). Circulating inventory is 2x the quantity the customer requires at the facility to service customers. While product is being actively used at the customer facility, an equal quantity is required to be in process at the plant being cleaned and laundered for the next scheduled delivery.
Note: The Remark field is optional and can be used to indicate the contact name that requested the change.
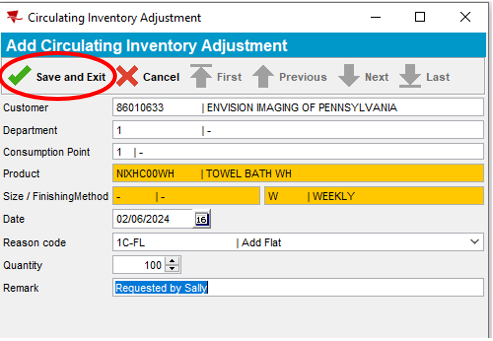
- Save and Exit
- Save and Exit
Note: A transaction history log is maintained. It shows who added product to the customer account and the date and time the add was made.
- Save and Exit
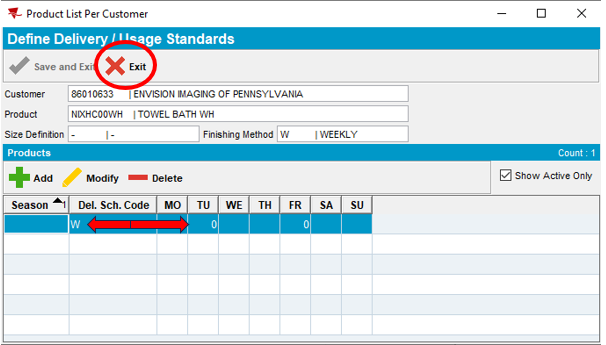
- Select Exit
Note: The Del. Sch. Code has now been added and appears automatically (W = Weekly). Product delivery days are set to (TU = Tuesday, FR = Friday) according to the customer service days in our example.
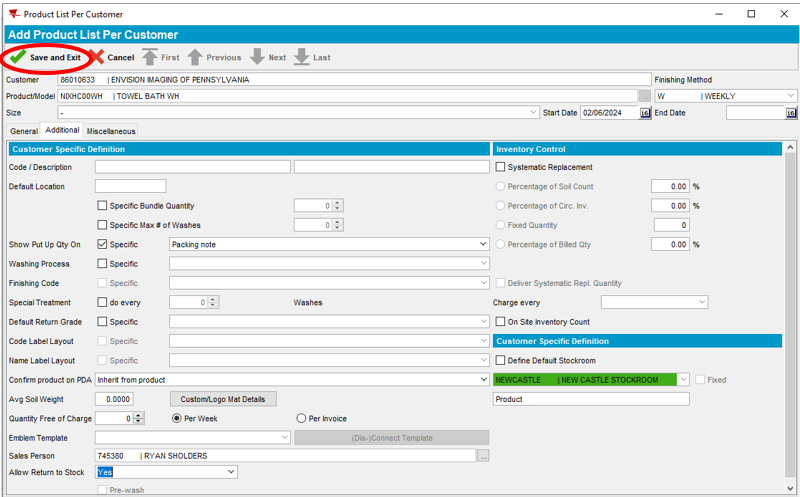
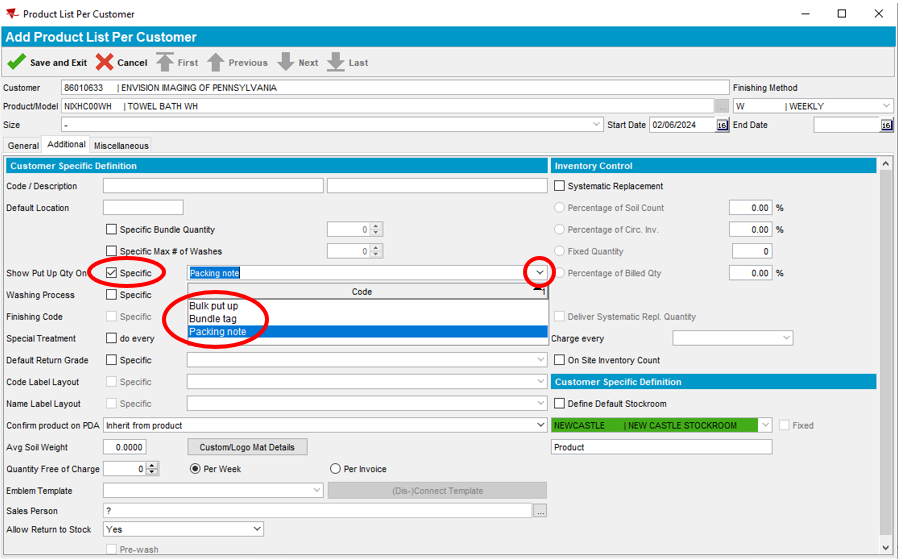
- Select the Additional tab
- Check the Specific box next to Show Put Up Qty On, select how you would like the loadout placed for the RSR
Note: The packing note section determines whether the RSR receives a dedicated blue rolling cart containing product for this customer only, or a bulk cart which contains product for multiple customers. It is important that the selection is consistent for all products on the account.
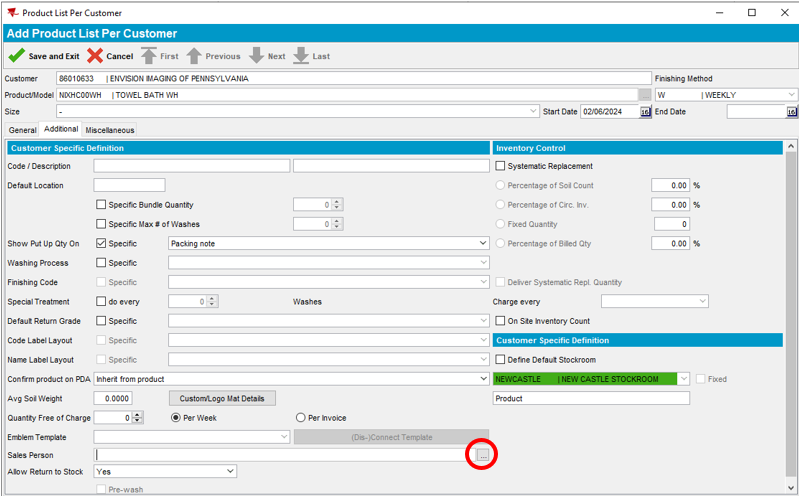
- Select the ellipses located in the Sales Person field
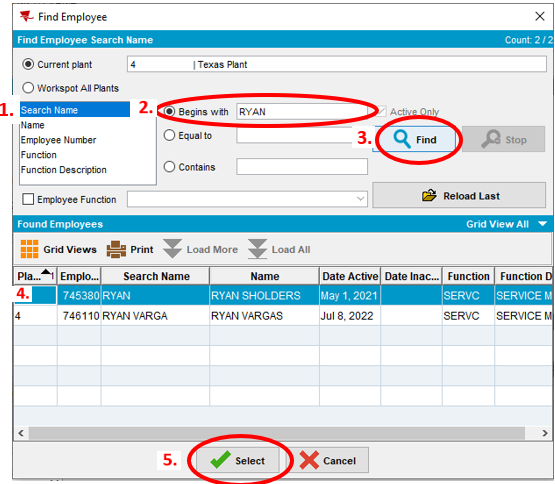
- Select Search Name and enter the first name of the RSR assigned to the route, Select Find
Note: This field must be filled in or ABS will not allow you to save the new flat item to the account.
- Highlight the RSR’s name assigned to the route and hit Select
- Save and Exit