
 34
34
Objective: The process of adding and removing garments as customer staff levels and Wearers change. Route Service Representatives must maintain an accurate wearer inventory to ensure Customer Satisfaction levels remain high.
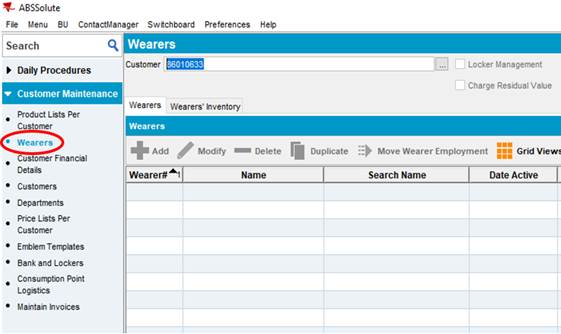
Location in ABS (System): Wearers
Who is Responsible: The responsibility for garment adjustments lies with the Route Service Representatives (RSRs). RSRs must take responsibility and make garment adjustments in the PDA. By properly managing the customer’s garment inventory, customers’ trust and satisfaction (NPS) will improve. If necessary, Service Managers and Regional Service Directors can also make garment adjustments in ABS by completing the following steps:
Complete the following steps to make a garment adjustment:
Note: Before adding a garment to a Wearer, ensure that the product is in the Product List Per Customer listing.
- Adding Garments are performed using the Wearer icon under Customer Maintenance
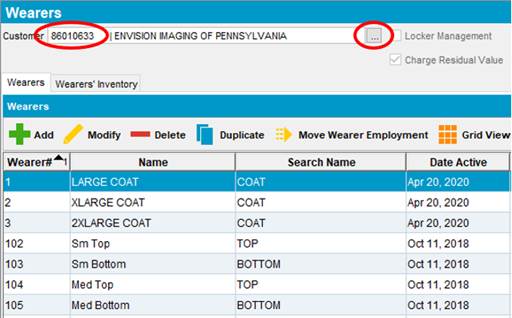
- Enter the Customer Number or use ellipses (search icon) to locate the desired customer
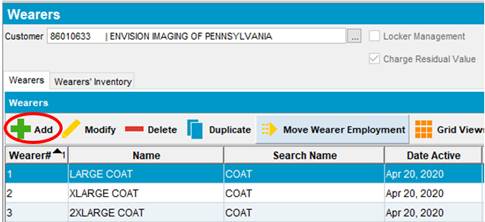
- If you would like to Add a new wearer, select Add
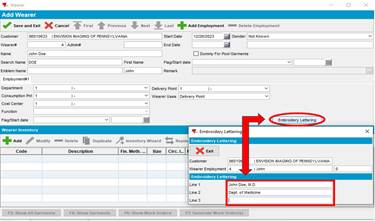
- Update the following fields:
- Wearer # - add a number that is new and currently not in use by another wearer.
- If a customer is using a garment locker system, all old garments must be keyed out of the existing wearer first before updating the wearer information. Refer to removing garments training before proceeding.
- Name – insert the first and last name of the new wearer
- Note: Search Name and First Name will auto populate based on the information entered.
- Gender – select Male, Female or Not Known
- Embroidery Lettering – only enter if the new wearer requires a name emblem or direct embroidery. Company emblems (logos) do not require this field to be populated.
- Line 1 – Wearers name and credentials
- Line 2 – Additional information such as location or department information. Not all customers request or require this information.
- Line 3 - Additional information if needed. Not all customers request or require this information.

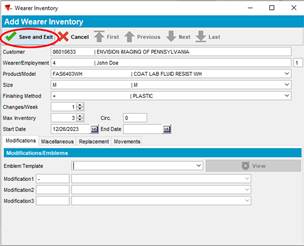
- Select Add to add garments to the new wearer
- Select the drop down in the Product/Model field to select the desired garment.
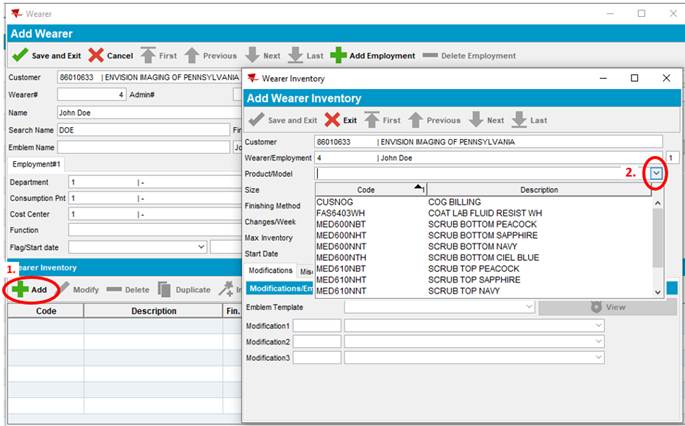
- Select the drop down in the Size field and select the wearers size

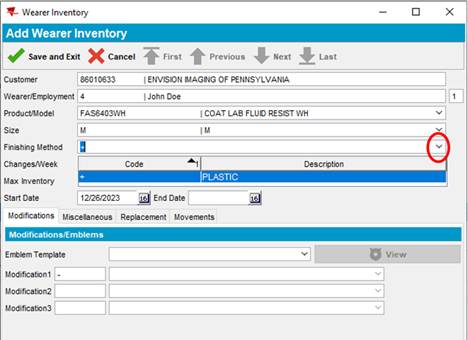
- Select the drop down in the Finishing Method field and select the finishing method
- Finishing methods are customer specific but options include:
- – Tunnel
- $ Press
- + Plastic
- $+ Press/Plastic
- Finishing methods are customer specific but options include:
Note: The finishing methods will only reflect the product codes entered in Product List Per Customer. If additional Finishing Methods are needed, new product codes will have to be entered for each new Finishing Method. Finishing Methods will only be applied to this garment. It will not be applied to all garments for this wearer or customer. You will have to select the Finishing Method for each garment added to a specific wearer.
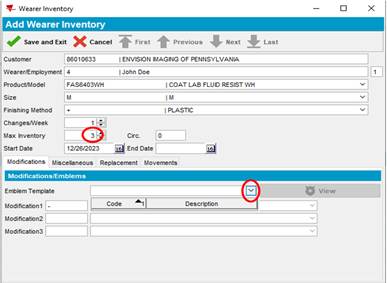
- Enter the total number of garments needed for the new wearer in the Max Inventory field.
- View the Nixon Medical resource video for Max Inventory recommendations (https://www.nixonmedical.com/resources/?v=2896).
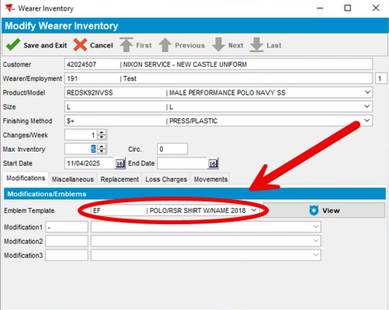
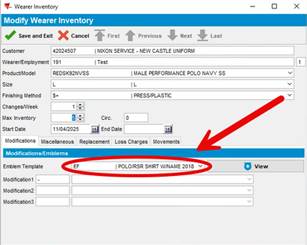
- Select the drop down in the Emblem Template field to select the emblem template.
Note: Not all garments require a Emblem Template and the field will be blank after selecting the drop down. If garments should be blank, do not select this field.
- Select Save and Exit
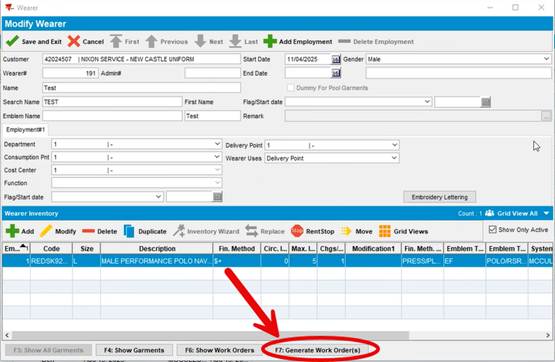
- Select Generate Work Orders
- Select the drop down in the Reason Code field. Select Add Wearer. Select Create Separate Workorder Per Inventory and OK
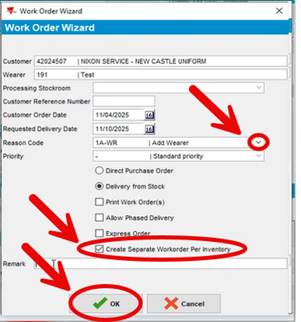
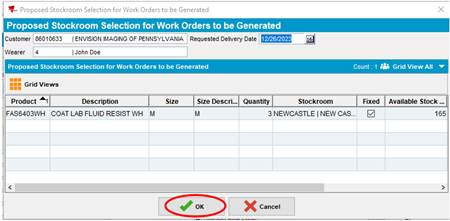
- Select Ok
Note: Proposed Stockroom Selection of Work Orders to be Generated pop up window will appear and provides garment availability information to the Service team . Window shows the Product Code, Description, Size, Quantity, Stockroom location and Available Stock in circulation. If Available Stock shows a negative number, then requested items may be on backorder and could take 4-6 weeks (in some cases longer) to ship and receive.
- Work order pop up window will appear to automatically process and send the new work order to the stockroom. Select close once complete.

