23
23
Objective: The process of removing and replacing garments due to loss, damage, or wear and tear. Route Service Representatives must maintain an accurate wearer inventory to ensure customer satisfaction levels remain high.
Location in ABS (System): Wearers
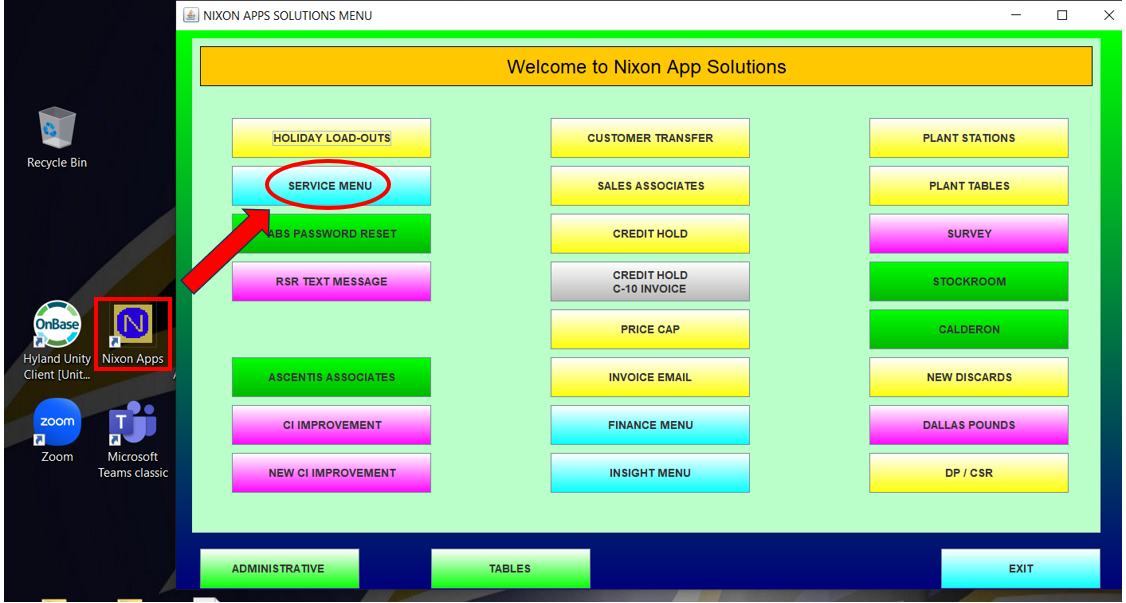
Location in the Nixon App: Service Menu / ”Barcode Free Rag-and Batch”
Who is Responsible: The responsibility for garment adjustments lies with the Route Service Representatives (RSRs). By properly managing the customer’s garment inventory, customers’ trust and satisfaction (NPS) will improve. The term “Rag” in ABS refers to adding a flag or specific action to a garment’s barcode. The term “Batch” refers to an action step taken after the garments are ragged (flagged). If necessary, Service Managers and Regional Service Directors can also make garment adjustments in ABS by completing the following steps:
Complete the following steps to rag and batch garments from an account:
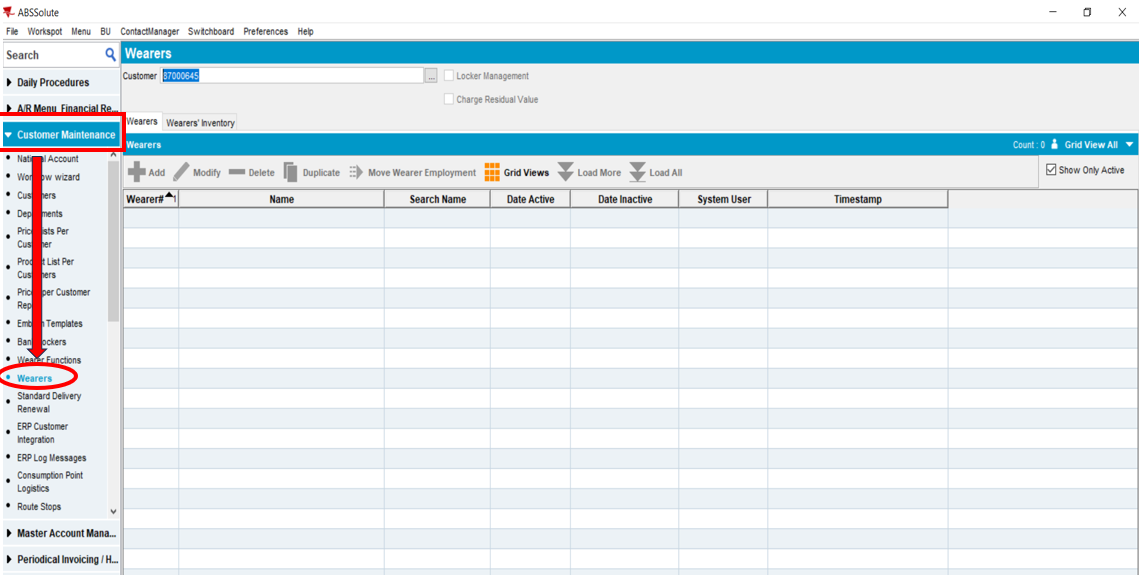
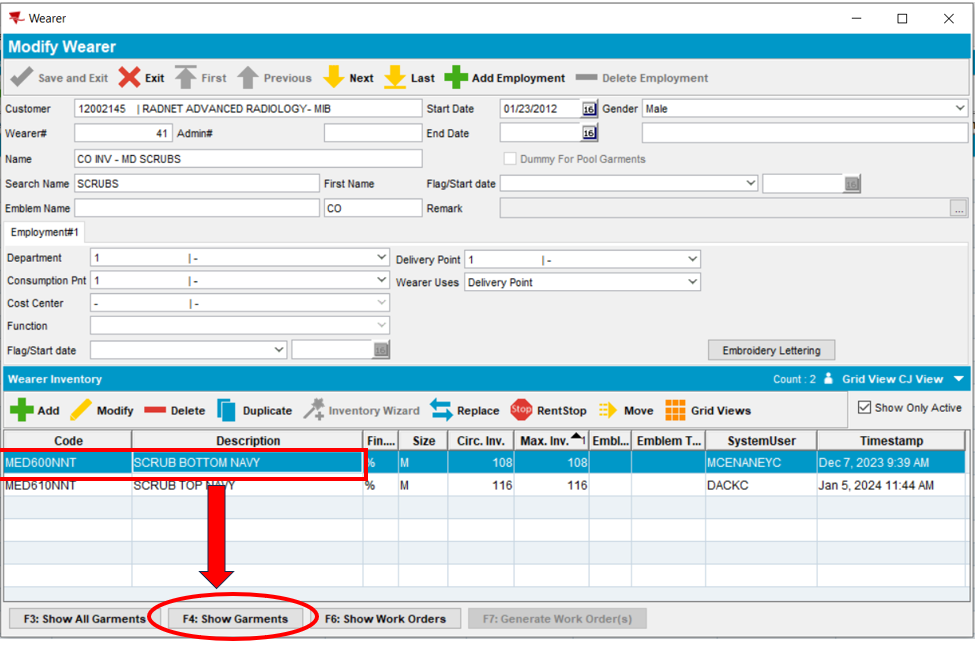
- In ABS, navigate to Customer Maintenance - Wearers
- Flagging garments for Rag and Batch are performed using the Wearers icon
Note: Rag and Batch is the process of identifying and removing garments from a customer’s account. You may permanently remove the products or replace the products using this process. You will most frequently use this process when multiple garments need to be removed. Products to be removed are most frequently identified during a garment inventory.
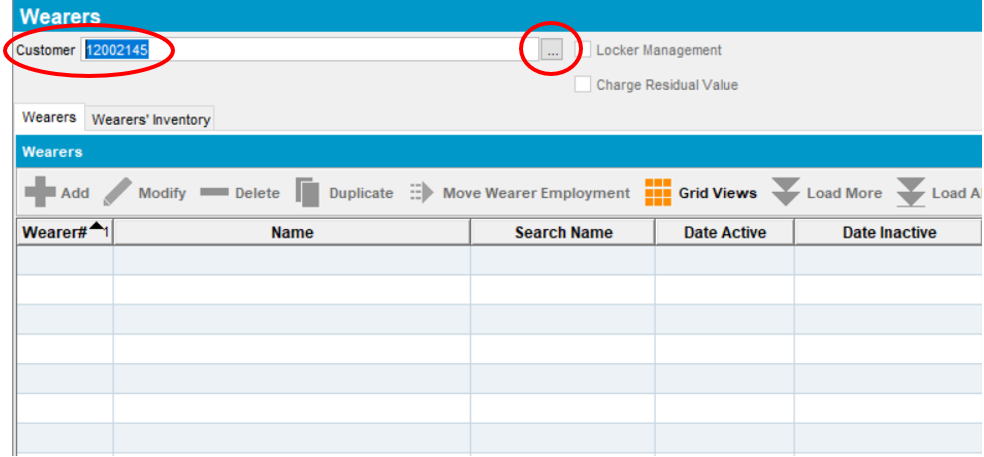
- Enter the eight-digit Customer Number or use ellipses (search icon) to locate the desired customer
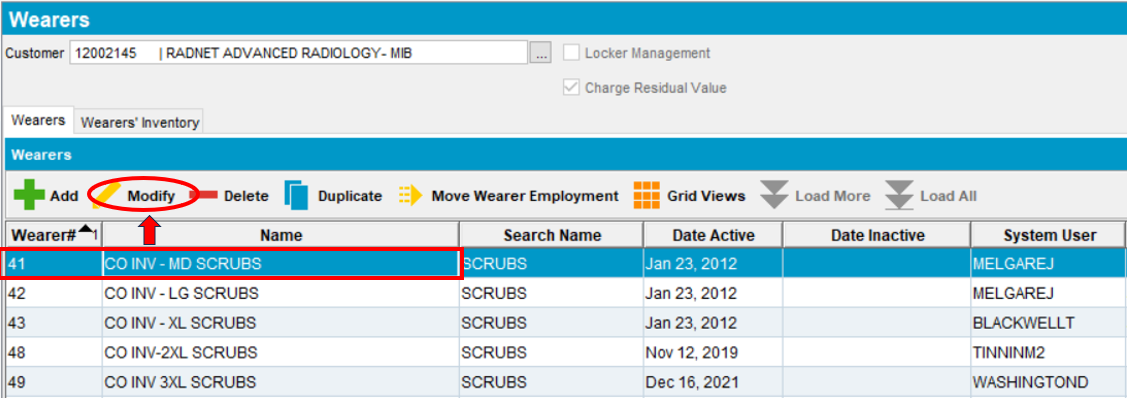
- To flag garments for Rag and Batch, select the desired field under Name or Wearer# and select Modify.
- Select the product you would like to flag for removal under Wearer Inventory and click Show Garments. If you would like to flag all products listed for the wearer, click Show All Garments.
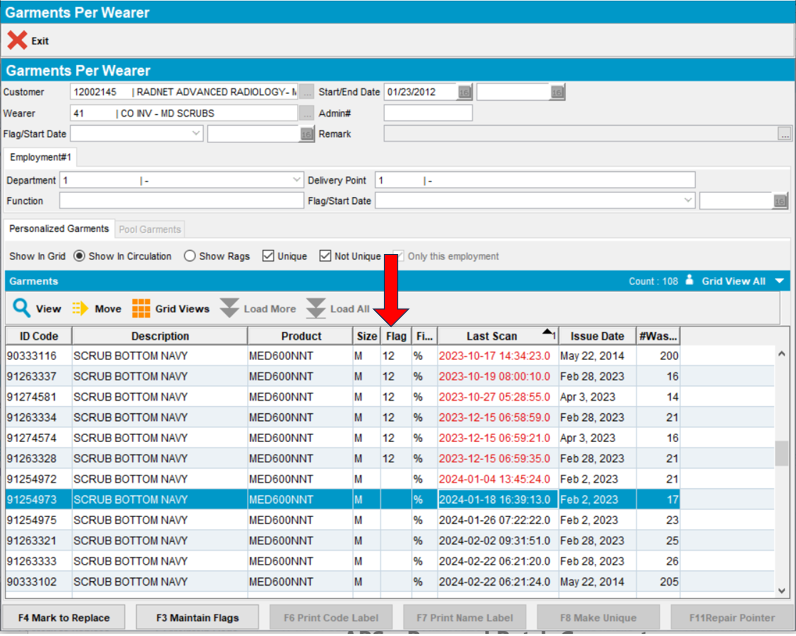
- Click the arrow displayed in the Last Scan header field to sort dates in descending order
Note: Dates appear in “red” or “black” font. “Red” font signifies that an item has not be scanned by the PDA or the Plant laundering process in eight weeks or more. “Black” font signifies that an item has been scanned within the last eight weeks. Items that have not been scanned in eight weeks or more are candidates for replacement.
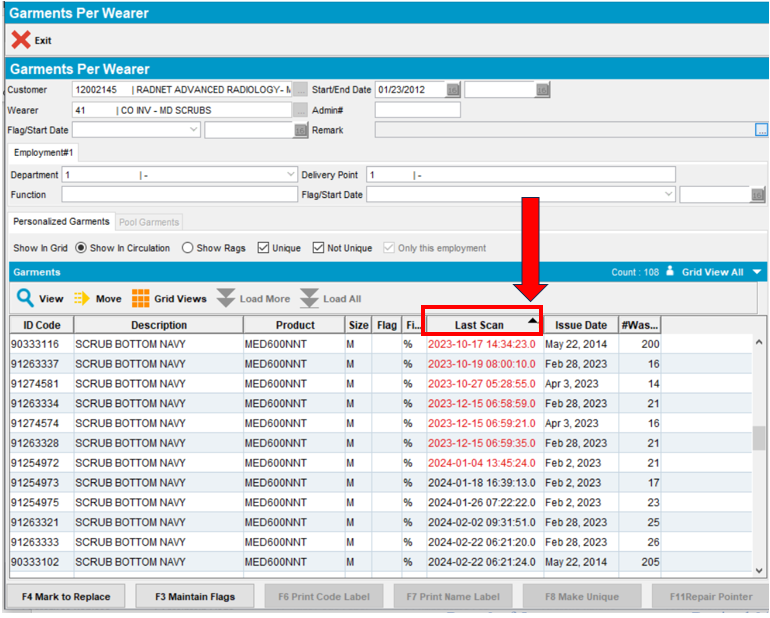
- Click and drag all red barcodes you would like to flag for replenishment and click Add Flags
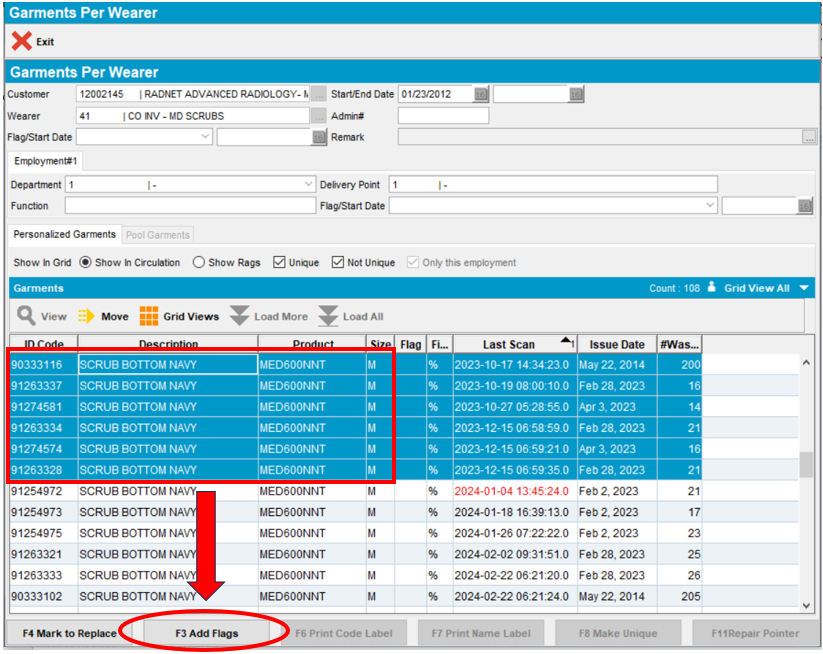
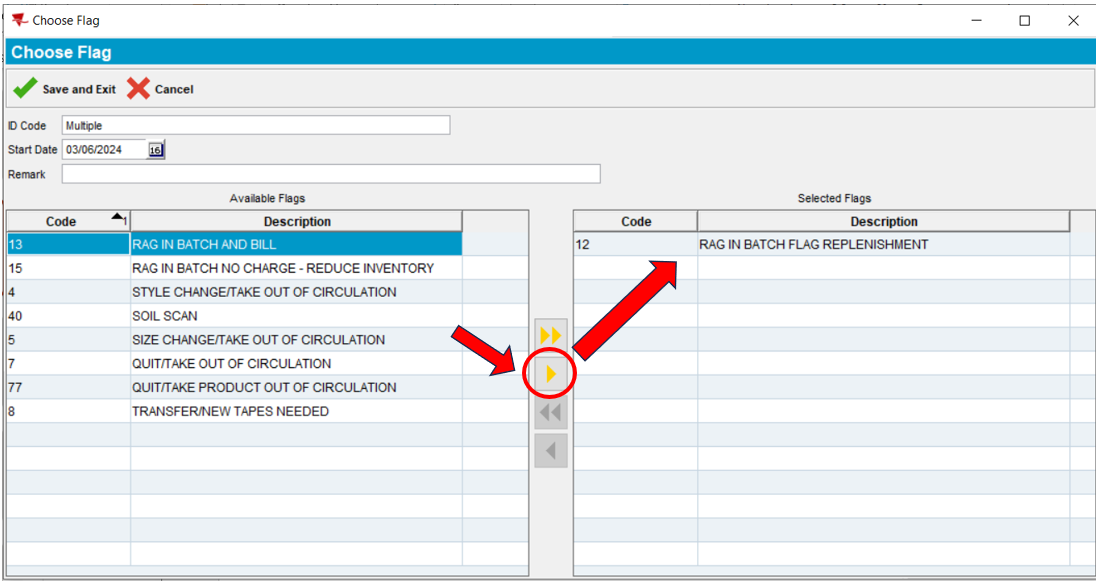
- Select the type of flag you would like to place on the highlighted barcodes under Available Flags (See flag types below).
Note: Customers paying for LDP (Loss Damage Protection
- Code 12 – Garments flagged for replacement at no charge
- Code 15 – Garments flagged for reduction at no charge
Customers not paying for LDP
- Code 13 – Garments flagged for reduction or replacement at the replacement charge signed in their agreement
All other codes are not used by the Service team.
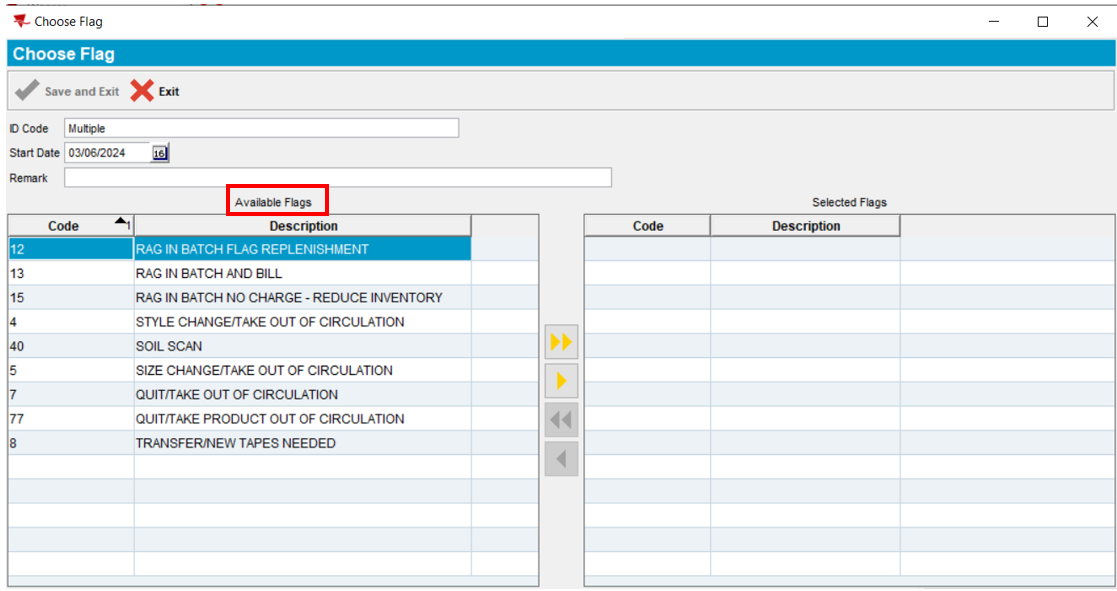
9. Select the single yellow arrow to move the Available Flags to the Selected Flags. In the example below, we selected Flag 12 – Rag In Batch Flag Replenishment (Flags instruct Plant Associates no what action to take with the garments when it is scanned in the plant).
10. Select Save and Exit
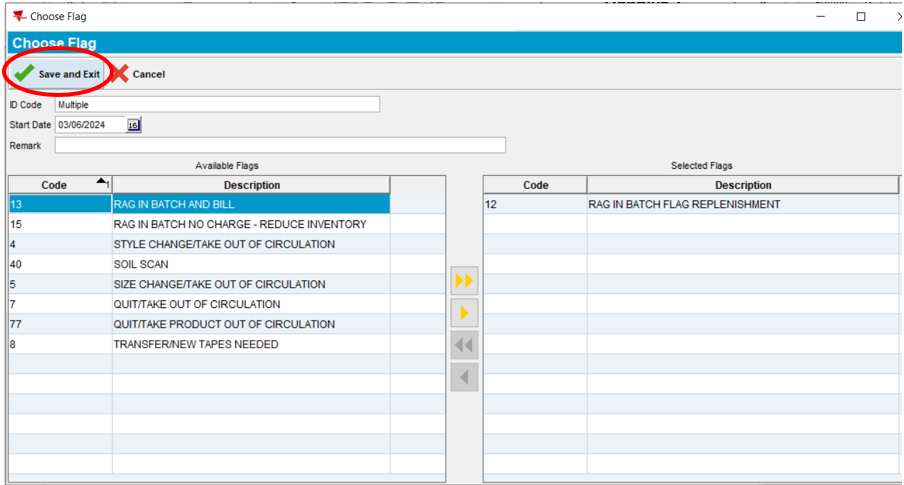
11. Systematic flags are now attached to the selected barcodes. In our example, we used Flag 12
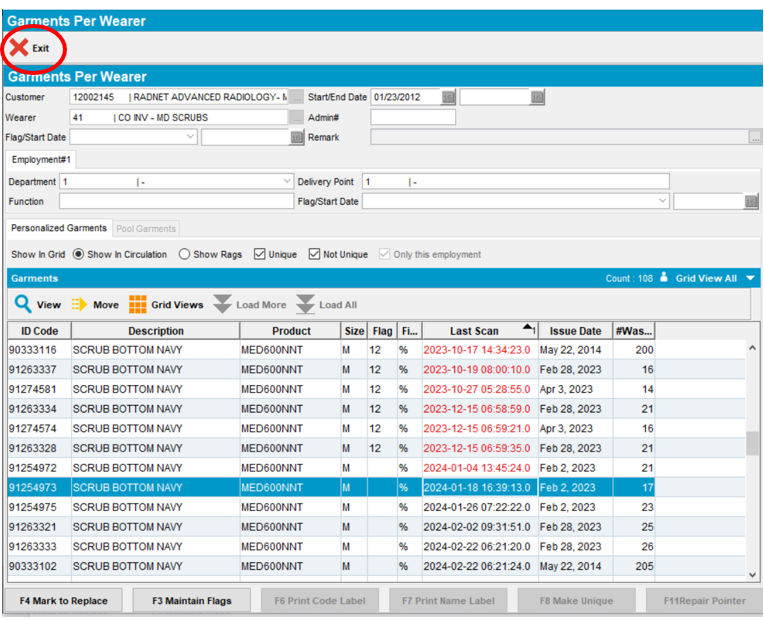
12. Click Exit
13. Next, go into the Nixon Apps and select Service Menu
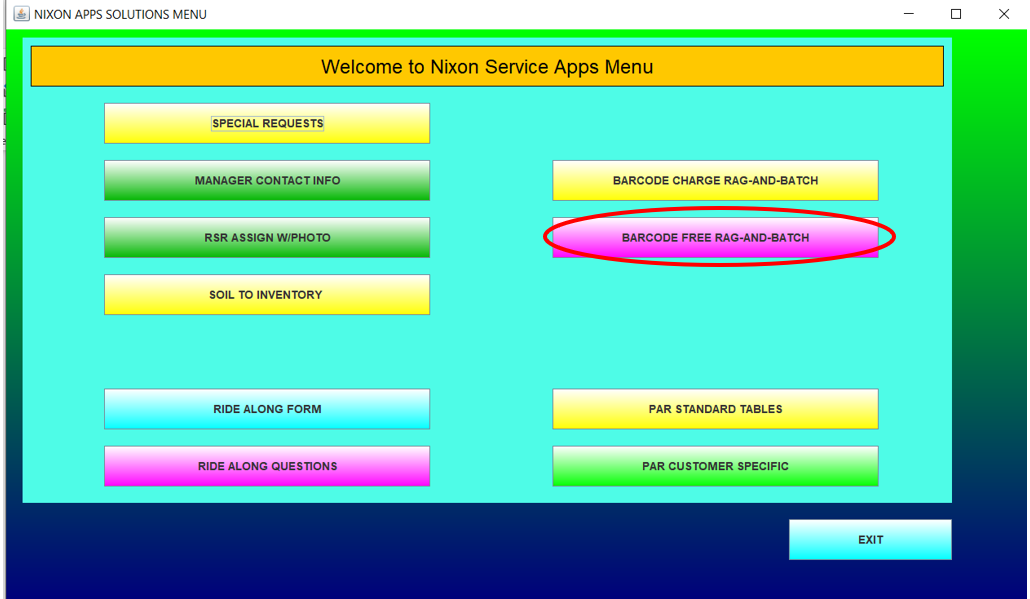
14. Select Barcode Free Rag-and-Batch
Note: Select Barcode Charge Rag-and-Batch for customers not paying for LDP and to charge for garment replenishment. If you are unsure if the customer is paying for LDP, review the most recent invoice in ABS. LDP charges are indicated on the last under Product Description.
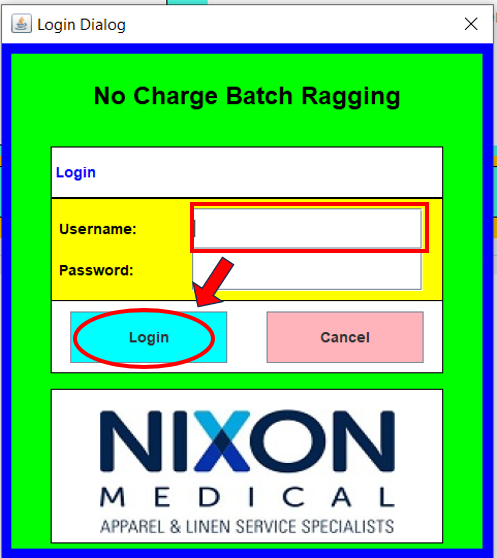
15. Enter your ABS username and Select Login
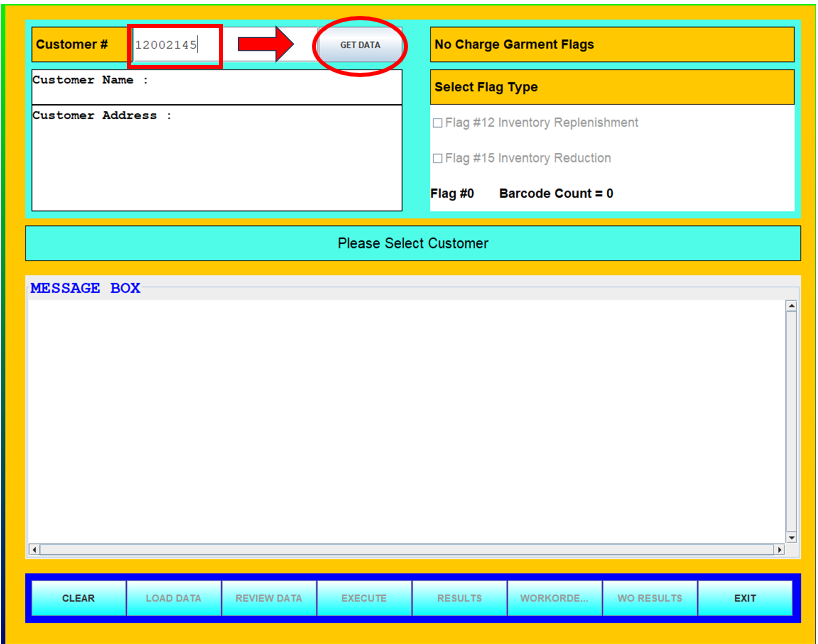
16. Enter the 8-digit customer number and Select Get Data
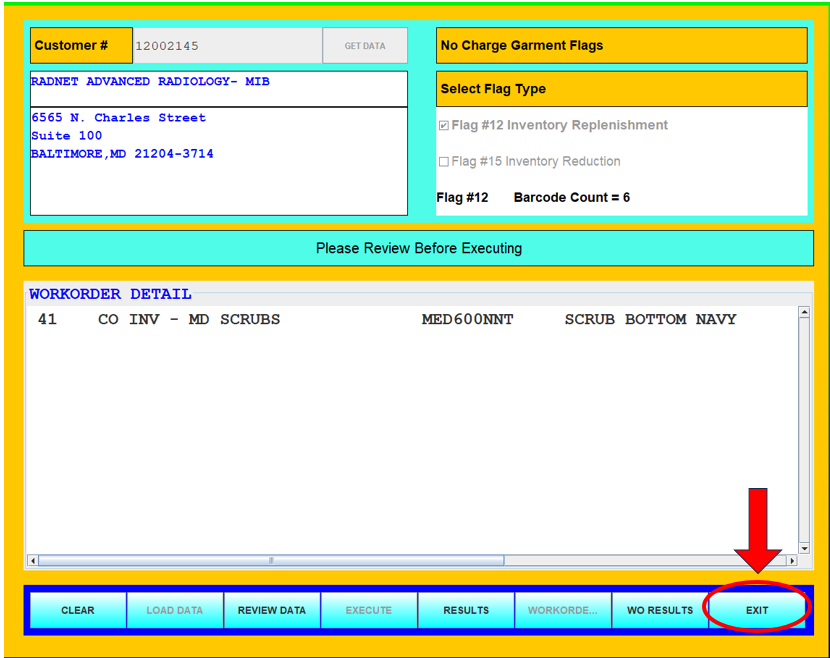
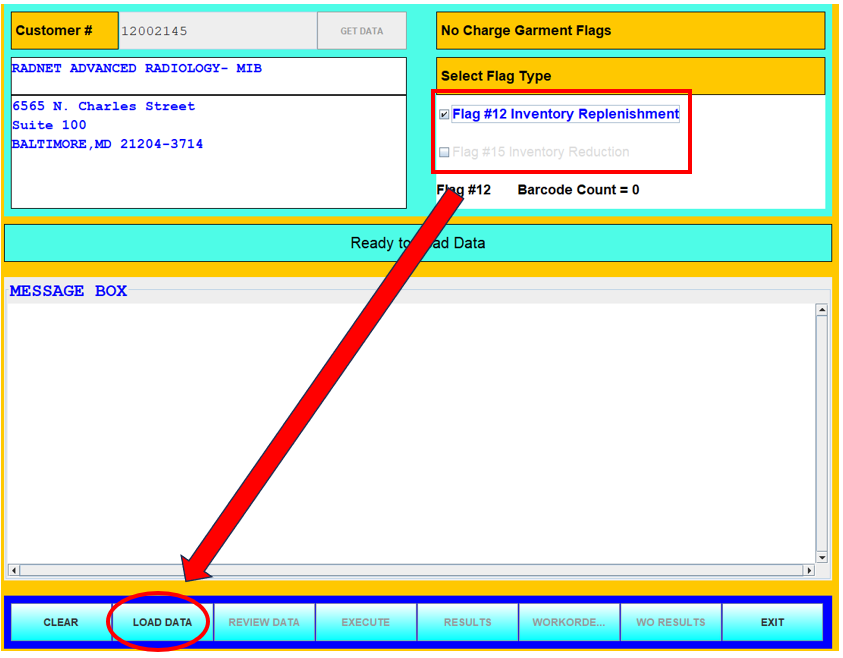
17. Select the Flag Type and click Load Data. In the example below, we used Flag 12.
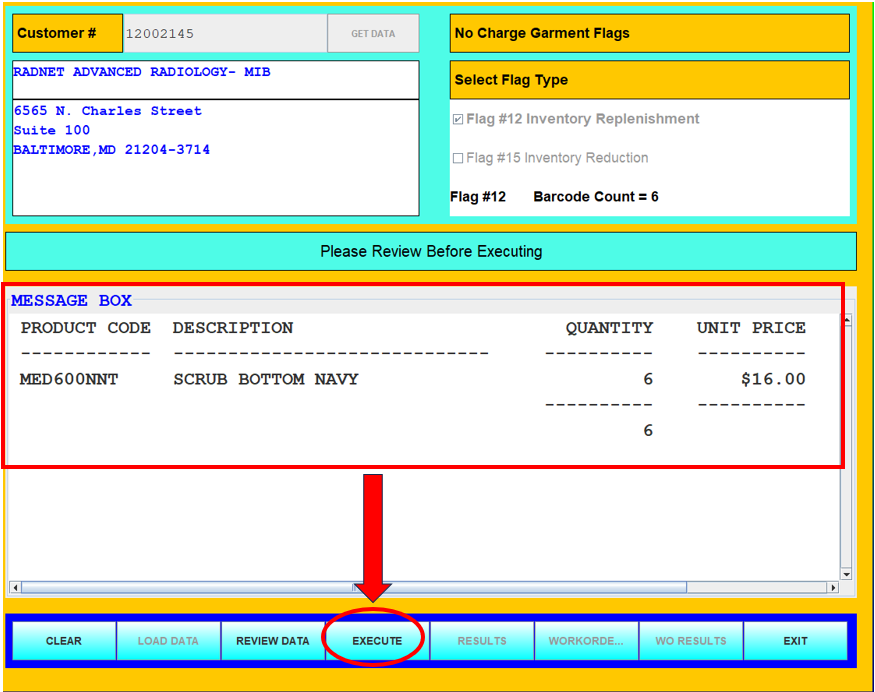
18. Product Code, Description and total Quantity will appear in the Message Box. Click Execute.
Note: If the quantity is incorrect and you flagged too many garments, you will then have to go into ABS and remove each incorrect flag.
19. The ABS Update Progress pop up window will appear and remove all flagged barcodes from the customer account in ABS. Click OK once complete.
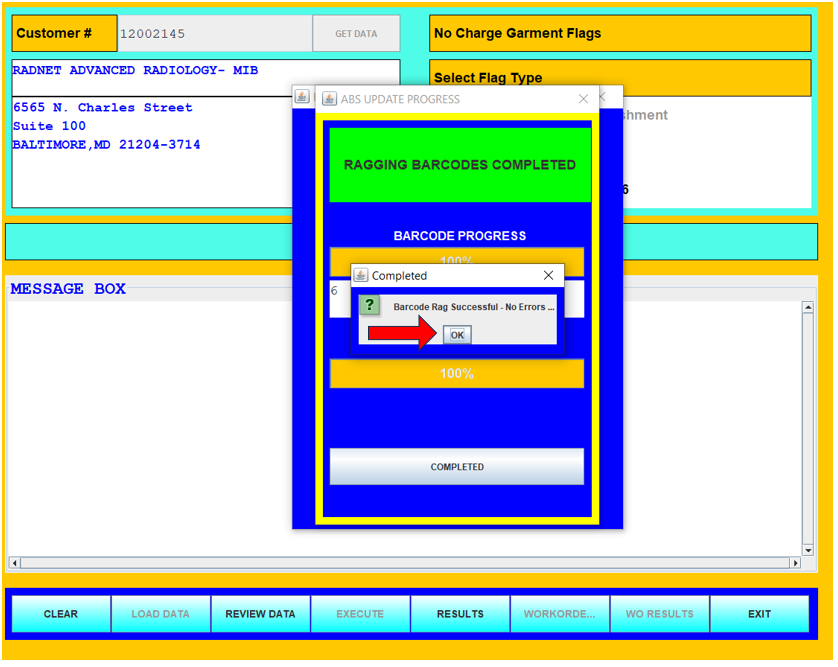
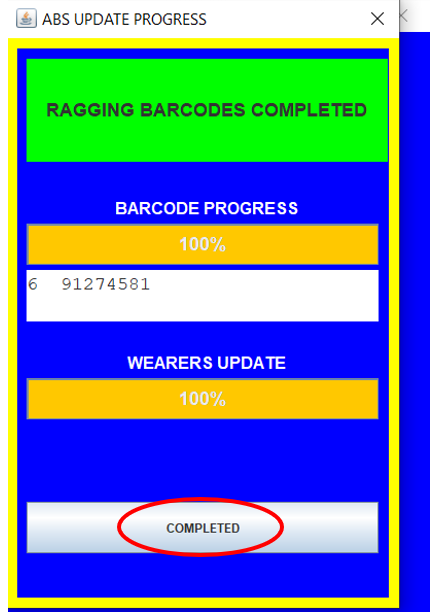
20. Click Completed
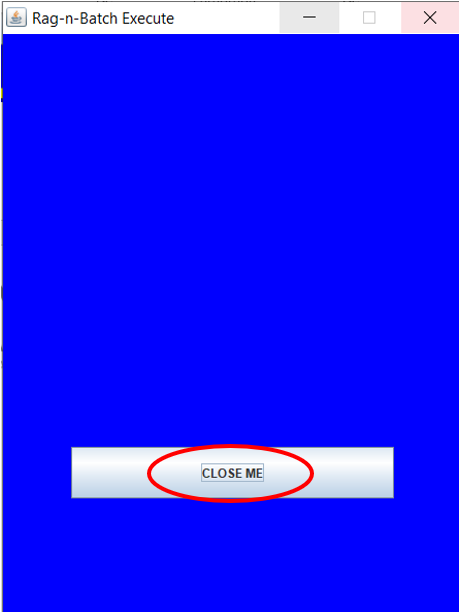
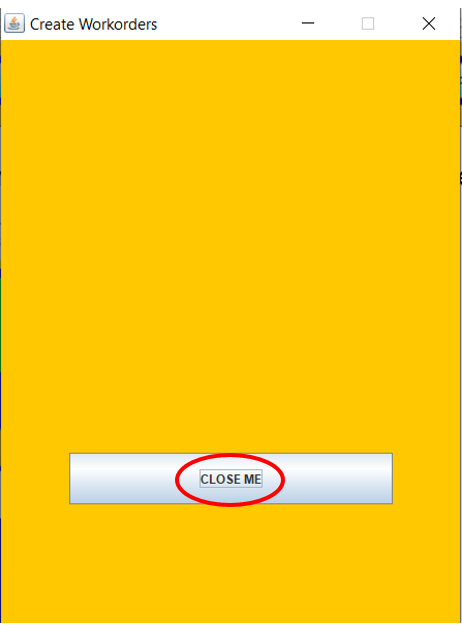
21. Click Close Me
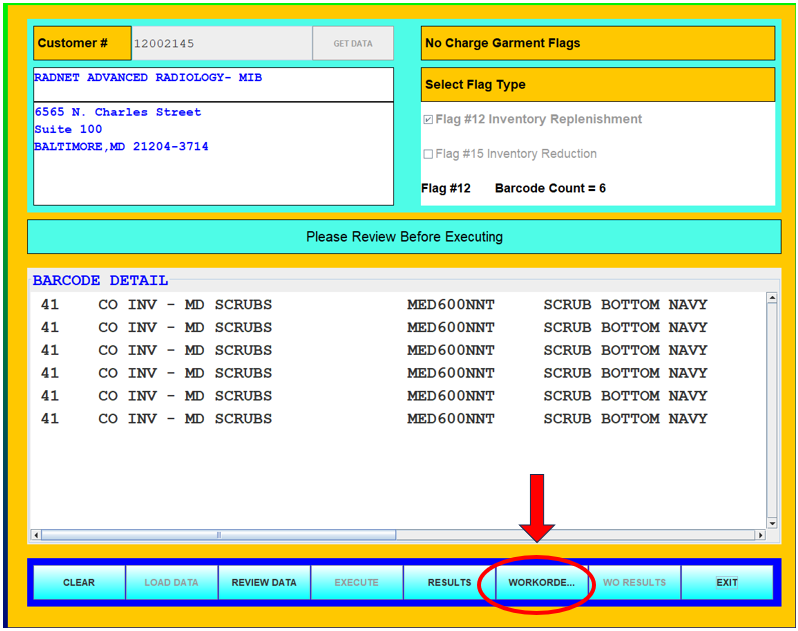
22. Select Workorders to generate a work order for the scrubs you just removed above and submit to the Stockroom.
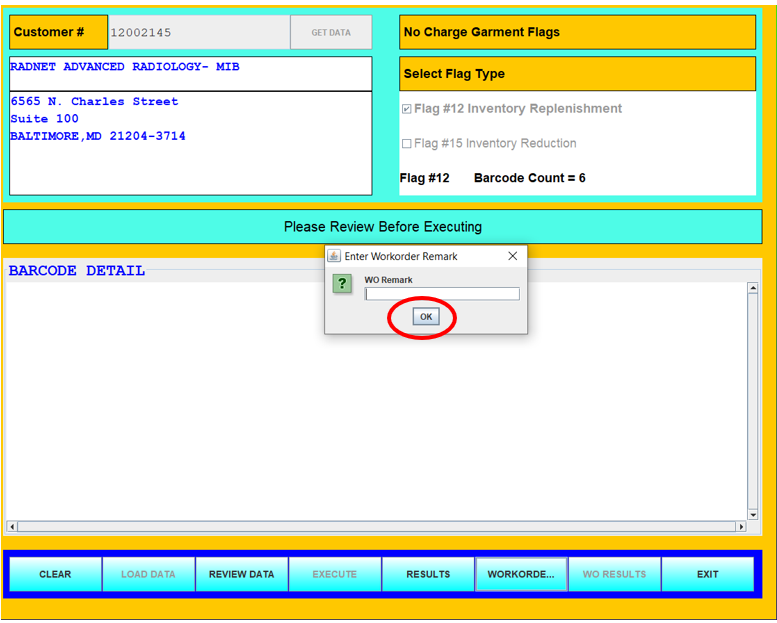
23. Enter special instructions for the Stockroom team in the Enter Workorder Remark field and select OK. If no special instructions are needed, leave blank and select OK (e.g. A special request WO Remark could be “Please rush”, “Customer needs asap”, etc).
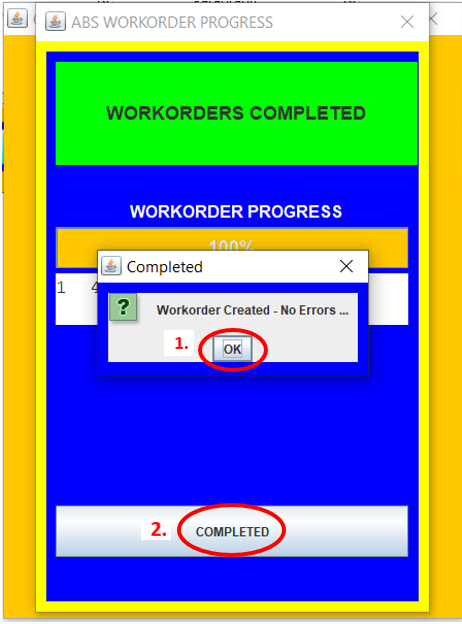
24. After the ABS Workorder Progress is complete, click OK and Completed.
25. Click Close Me
26.Click Exit